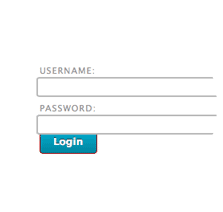
Log into Anthology Portfolio here.
I want to...
| 1. Sign into the Anthology Portfolio website with the ID and password you used when registering your AP code. | 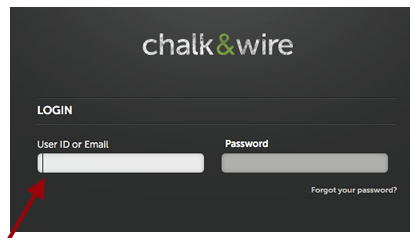 |
|
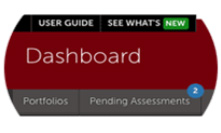
2. There are two ways to access pending assessments. First, you can click on your Pending Assessments tab in the middle of your Dashboard. |
 |
| If the Dashboard is not the screen that loads once you first log in, click the Menu icon and select the first entry, Dashboard, from the sliding navigation bar on the left. | 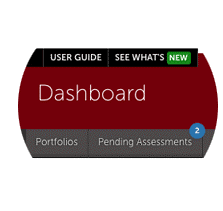 |
| Alternatively, you can click on the Assessment tab from the Menu, then click Assess. You should now see a listing of all of your pending assessments.You can navigate to the right and click on "Completed Assessments" to see all of the assessments that you have already reviewed. | 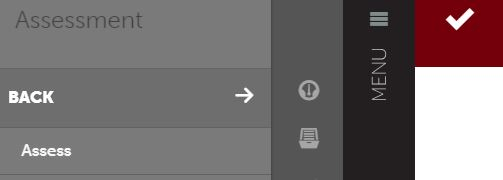 |
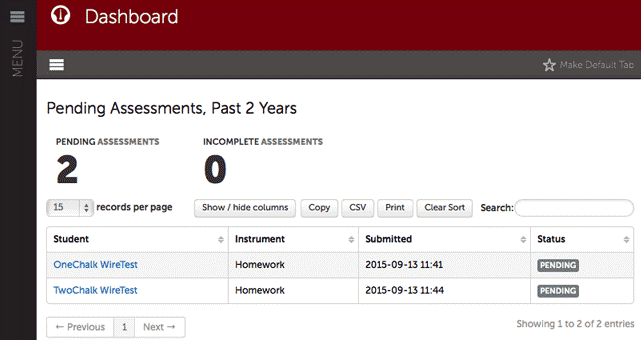
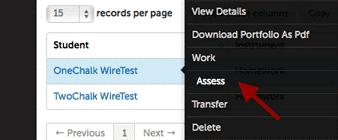
| 3. You will next see a list of awaiting assignments. Each assignment can be identified by the student's name, the rubric to be used, and the name of the submitted file. This is to help identify different assignments that might be submitted at the same time from different classes. | |
 |
|
|
4. To begin the assessment process, you will want to move your cursor over the line of the assignment you want to assess and click once. You will want to click to the right of the student's name as clicking the actual name brings up the student's profile information. Once you click in the appropriate place on the line, a contextual menu pops up. Assess is the option you need to click. |
 |
|
5. The main viewing area is now divided into two parts: the rubric pane and the assignment pane. If you do not see both or would like to change the view of the rubric at any point, you can click on the View Full Instrument button highlighted in white beside the "Save" button. |
 |

6. From here, you can view the submitted video and Add Comments by clicking on the Add Comment button below the video. This will pause the video and allow for you to comment on that frame. You can type in your comment or click Record Audio Comment to speak your comment. You can add as many comments as you like throughout the portion of the video, and your intern will receive these along with the exact part of the video each comment was left. Ensure that you click Save Comment after you complete each.

7. You will now want to assess the assignment by selecting their scores in each part
of the SCTS 4.0 rubric. All you will need to do is select the correct box on the rubric
on the right of your screen. If for some reason you do not want to score using the
rubric or do not want to score a certain criteria, you can select N/A. There is also
an option to leave a comment after each part of the rubric. 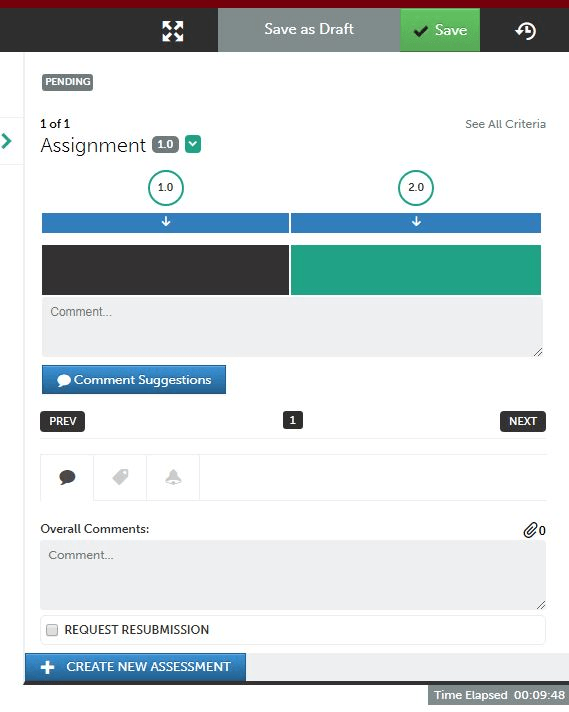
8. You can also choose to leave an overall comment on the submission in the Overall Comments box.
9. Your last step will be to select the green Save button at the top of the screen.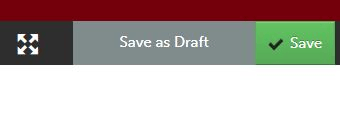 10. You have now completed this student’s assessment and can then go back to the beginning
of these instructions to assess your next student’s assignment.
10. You have now completed this student’s assessment and can then go back to the beginning
of these instructions to assess your next student’s assignment.
Once rubrics have been entered into Anthology Portfolio and Assignments have been created in Blackboard to link to those rubrics, students can submit their assignments for review. These are the steps necessary for assessing a student's work and ensuring that the result is properly captured for accreditation purposes.There are two ways to access student submissions. You may access them through Blackboard, or log in directly to Anthology Portfolio. We recommend directly logging in to Anthology Portfolio, but will present both options below.
BLACKBOARD
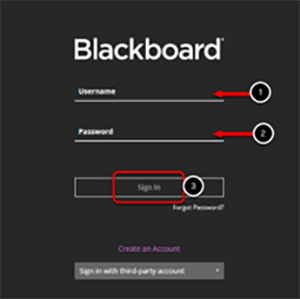
 Log in to Blackboard with your regular Username and Password (http://blackboard.sc.edu).
 From the list of courses displayed on the right of your screen, click on the course
that contains this assignment. Be certain to double-check the semester and year if
you have taught this class before.
From the list of courses displayed on the right of your screen, click on the course
that contains this assignment. Be certain to double-check the semester and year if
you have taught this class before.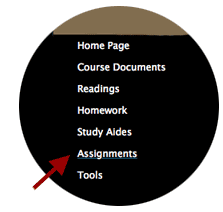 From the menu items on the left of the screen, click on the Assignments option.
 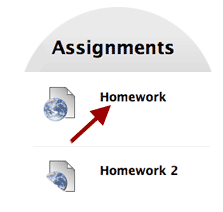 Click on the title of the assignment that has submissions to be reviewed. This will
open Anthology Portfolio inside of the Blackboard environment. You may now skip to
the ASSESSING A STUDENT ASSIGNMENT section below.
Click on the title of the assignment that has submissions to be reviewed. This will
open Anthology Portfolio inside of the Blackboard environment. You may now skip to
the ASSESSING A STUDENT ASSIGNMENT section below.
Anthology Portfolio
 1. Sign into the Anthology Portfolio website with the ID and password you used when registering your AP code. 2. There are two ways to access pending assessments. First, you can click on your
Pending Assessments tab in the middle of your Dashboard. If the Dashboard is not the screen that loads once you first log in, click the Menu icon and select the first entry, Dashboard, from the sliding navigation bar on the left.
1. Sign into the Anthology Portfolio website with the ID and password you used when registering your AP code. 2. There are two ways to access pending assessments. First, you can click on your
Pending Assessments tab in the middle of your Dashboard. If the Dashboard is not the screen that loads once you first log in, click the Menu icon and select the first entry, Dashboard, from the sliding navigation bar on the left.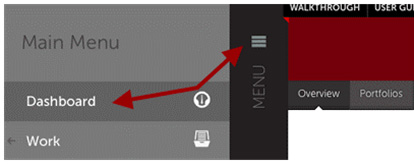
 Alternatively, you can click on the Assessment tab from the Menu, then click Assess. You should now see a listing of all of your pending assessments. You can navigate
to the right and click on Completed Assessments to see all of the assessments that
you have already reviewed.
Alternatively, you can click on the Assessment tab from the Menu, then click Assess. You should now see a listing of all of your pending assessments. You can navigate
to the right and click on Completed Assessments to see all of the assessments that
you have already reviewed.
3. You will next see a list of awaiting assignments. Each assignment can be identified
by the student's name, the rubric to be used, and the name of the submitted file.
This is to help identify different assignments that might be submitted at the same
time from different classes.
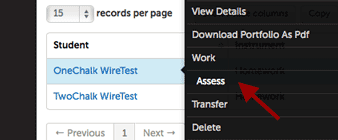 4. To begin the assessment process, you will want to move your cursor over the line
of the assignment you want to assess and click once. You will want to click to the
right of the student's name as clicking the actual name brings up the student's profile
information. Once you click in the appropriate place on the line, a contextual menu
pops up. Assess is one of the options and is the option you need to click.
4. To begin the assessment process, you will want to move your cursor over the line
of the assignment you want to assess and click once. You will want to click to the
right of the student's name as clicking the actual name brings up the student's profile
information. Once you click in the appropriate place on the line, a contextual menu
pops up. Assess is one of the options and is the option you need to click.
5. The main viewing area is now divided into two parts: the rubric pane and the assignment
pane. If you do not see both or would like to change the view of the rubric at any
point, you can click on the View Full Instrument button highlighted in white beside the Save button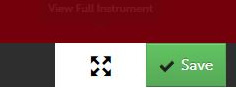
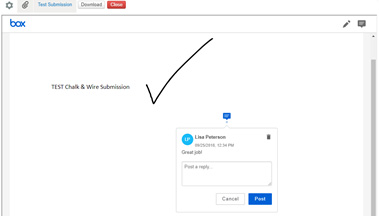
6. From here, you can view the submitted work, add overall comments by clicking
on the gear icon, or download the student’s submission. You can also click “View”
and add comments or draw/underline directly on the submission using the pen and comment
icons. Leaving comments is not required, but this is an option. 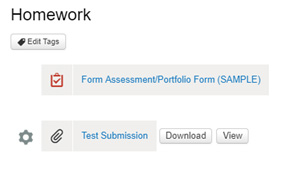
7. You will now want to Assess the assignment using your rubric. To the right of your screen, you will see your
rubric split into parts (as shown below). To see the entire rubric, you can select
the “View Full Instrument” icon.
- View Full Assessment Icon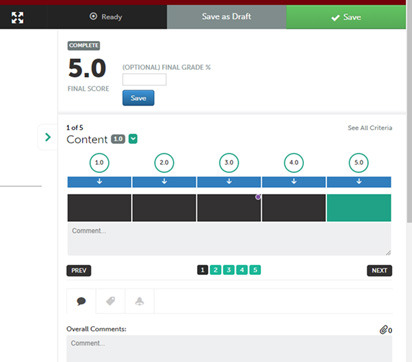
8. From this screen, you can hover over each box to see criteria or choose to “Show
Detailed View” to see all of the criteria listed in the rubric.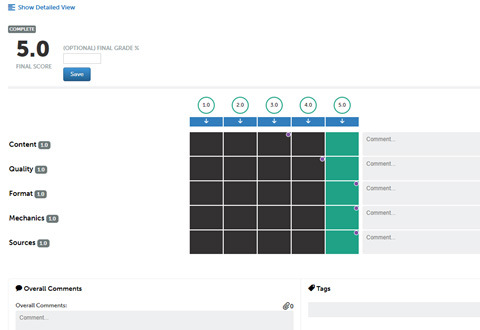
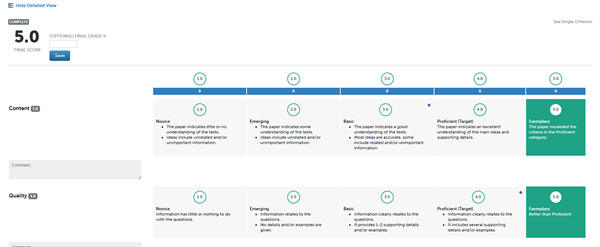 9. Once the elements of the rubric are set as you would like them, you can
begin assessing. To select the appropriate level of a rubric’s standard for the student’s
submission, simply click in the square. If it turns green, you have successfully selected
that level of proficiency for that standard. 10. When all of the proficiency levels
have been selected, click the green Save button. You will receive a message on the
screen notifying you the assessment has been saved. You may also save the assessment
as a draft and come back to it at a later time. Click the Save As Draft checkbox
and then the Save button to create a draft version.
9. Once the elements of the rubric are set as you would like them, you can
begin assessing. To select the appropriate level of a rubric’s standard for the student’s
submission, simply click in the square. If it turns green, you have successfully selected
that level of proficiency for that standard. 10. When all of the proficiency levels
have been selected, click the green Save button. You will receive a message on the
screen notifying you the assessment has been saved. You may also save the assessment
as a draft and come back to it at a later time. Click the Save As Draft checkbox
and then the Save button to create a draft version. 11. Once an assignment has been saved, options for placing a score automatically
in Blackboard becomes visible at the left of the screen. This area, as seen in the
image below, provides an average score of the different rubric categories, a space
for you to enter the percentage grade for the assignment based on the rubric, and
a drop-down box for you to select which assignment in the Blackboard grade book the
score should be placed. PLEASE NOTE: you may not enter a point score in the percentage grade box and have
it transfer to Blackboard accurately. It must be a percentage grade. If you do not
want a score to transfer to Blackboard gradebook, do not worry about entering anything
into this box. You can always enter a manual points grade into Blackboard.
11. Once an assignment has been saved, options for placing a score automatically
in Blackboard becomes visible at the left of the screen. This area, as seen in the
image below, provides an average score of the different rubric categories, a space
for you to enter the percentage grade for the assignment based on the rubric, and
a drop-down box for you to select which assignment in the Blackboard grade book the
score should be placed. PLEASE NOTE: you may not enter a point score in the percentage grade box and have
it transfer to Blackboard accurately. It must be a percentage grade. If you do not
want a score to transfer to Blackboard gradebook, do not worry about entering anything
into this box. You can always enter a manual points grade into Blackboard. 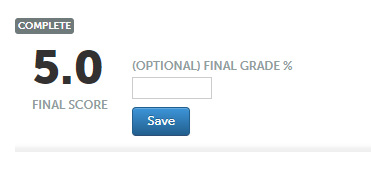 12. You have now completed this student’s assessment and can then go back to
the beginning of these instructions to assess your next student’s assignment.
12. You have now completed this student’s assessment and can then go back to
the beginning of these instructions to assess your next student’s assignment.
2. There are two ways to access pending assessments. First, you can click on
your Pending Assessments tab in the middle of your Dashboard. If the Dashboard is not the screen that loads once you first log in, click the Menu icon and select the first entry, Dashboard, from the sliding navigation bar on the left. Alternatively, you can click on the Assessment tab from the Menu, then click Assess. You should now see a listing of all of your pending assessments. You can navigate
to the right and click on Completed Assessments to see all of the assessments that
you have already reviewed.  3. You will next see a list of awaiting assignments. Each assignment can be identified
by the student's name, the rubric to be used, and the name of the submitted file.
This is to help identify different assignments that might be submitted at the same
time from different classes.
3. You will next see a list of awaiting assignments. Each assignment can be identified
by the student's name, the rubric to be used, and the name of the submitted file.
This is to help identify different assignments that might be submitted at the same
time from different classes. 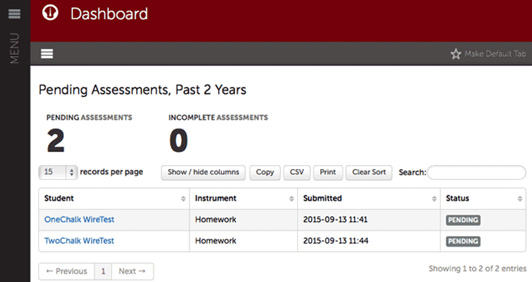 4. To begin the assessment process, you will want to move your cursor over
the line of the assignment you want to assess and click once. You will want to click
to the right of the student's name as clicking the actual name brings up the student's
profile information. Once you click in the appropriate place on the line, a contextual
menu pops up. Assess is one of the options and is the option you need to click.
4. To begin the assessment process, you will want to move your cursor over
the line of the assignment you want to assess and click once. You will want to click
to the right of the student's name as clicking the actual name brings up the student's
profile information. Once you click in the appropriate place on the line, a contextual
menu pops up. Assess is one of the options and is the option you need to click. 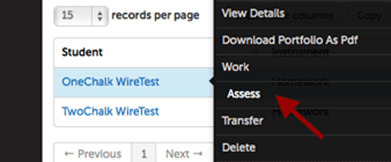 5. The main viewing area is now divided into two parts: the rubric pane and
the assignment pane. If you do not see both or would like to change the view of the
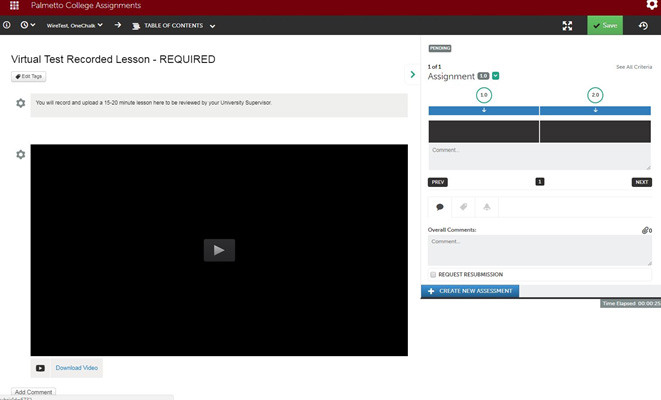
rubric at any point, you can click on the View Full Instrument button highlighted in white beside the Save button. 6. From here, you can view the submitted video and Add Comments by clicking on the Add Comment button below the video. This will pause the video
and allow for you to comment on that frame. You can type in your comment or click
Record Audio Comment to speak your comment. You can add as many comments as you like throughout the portion
of the video, and your intern will receive these along with the exact part of the
video each comment was left. Ensure that you click Save Comment after you complete each.
5. The main viewing area is now divided into two parts: the rubric pane and
the assignment pane. If you do not see both or would like to change the view of the
rubric at any point, you can click on the View Full Instrument button highlighted in white beside the Save button. 6. From here, you can view the submitted video and Add Comments by clicking on the Add Comment button below the video. This will pause the video
and allow for you to comment on that frame. You can type in your comment or click
Record Audio Comment to speak your comment. You can add as many comments as you like throughout the portion
of the video, and your intern will receive these along with the exact part of the
video each comment was left. Ensure that you click Save Comment after you complete each.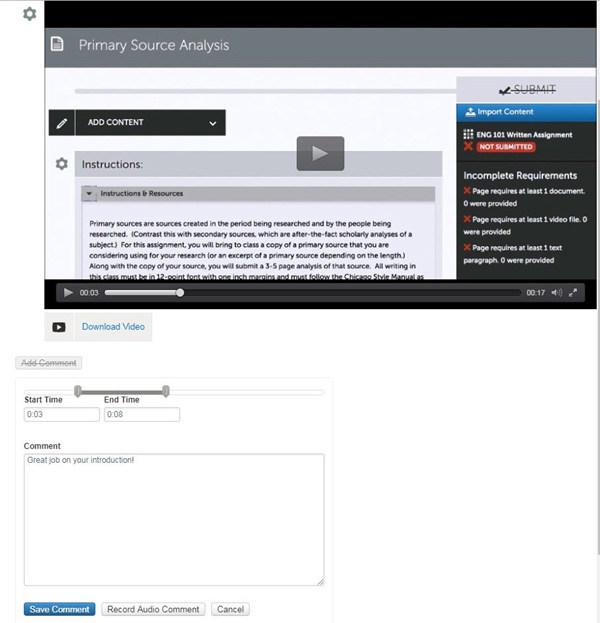 7. You will now want to “assess” the assignment by acknowledging that you received the
video submission. All you will need to do is select the 2 box on the rubric on the
right of your screen. When you hover over this 2, you will see that it says “Complete.
Assignment was uploaded correctly and received by the supervisor.” If the student
did not correctly upload a video, then you can select 1, which says “Incomplete. Assignment
was not uploaded correctly.” The student will then be notified and can resubmit.
7. You will now want to “assess” the assignment by acknowledging that you received the
video submission. All you will need to do is select the 2 box on the rubric on the
right of your screen. When you hover over this 2, you will see that it says “Complete.
Assignment was uploaded correctly and received by the supervisor.” If the student
did not correctly upload a video, then you can select 1, which says “Incomplete. Assignment
was not uploaded correctly.” The student will then be notified and can resubmit.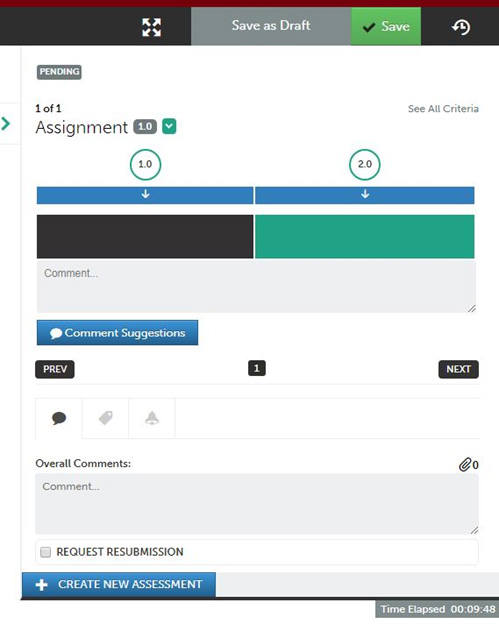 8. You can also choose to leave an overall comment on the submission in the Overall
Comments box, but this is not required.9. Your last step will be to select the green
Save button at the top of the screen. 10. You have now completed this student’s assessment and can then go back to the
beginning of these instructions to assess your next student’s assignment.
8. You can also choose to leave an overall comment on the submission in the Overall
Comments box, but this is not required.9. Your last step will be to select the green
Save button at the top of the screen. 10. You have now completed this student’s assessment and can then go back to the
beginning of these instructions to assess your next student’s assignment.|
Log in to Blackboard with your network username and password. This will be the same information that is used for your campus email account. |
 |
|
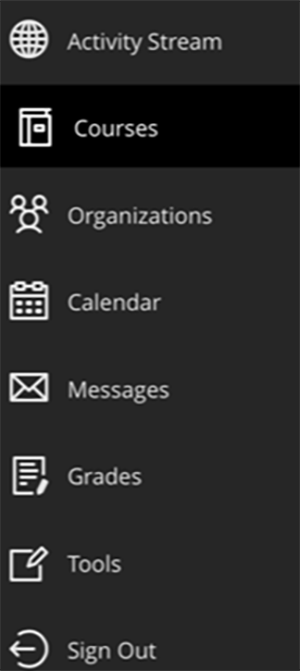
Click on the Courses selection from the activity stream menu at the left of your screen. Select the appropriate course from the Course List. |
 |
|
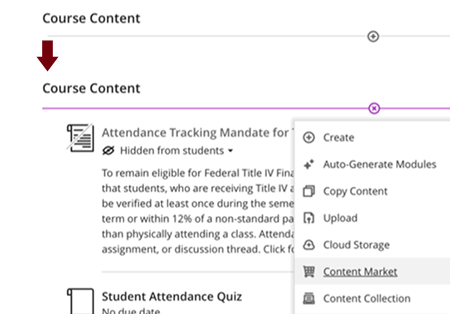
Once you have selected the appropriate course, click on the Add Content (+) icon under Course Content. Select Content Market. |
 |
|
Next, you will be redirected to the Content Market- Institution Tools Page. |
 |
|
Scroll down and select the (+) on the Chalk and Wire. |
 |
|
You will now see a Chalk and Wire assignment under your Course Content. Click on the three dots to the right of your screen and select Edit. |
 |
|
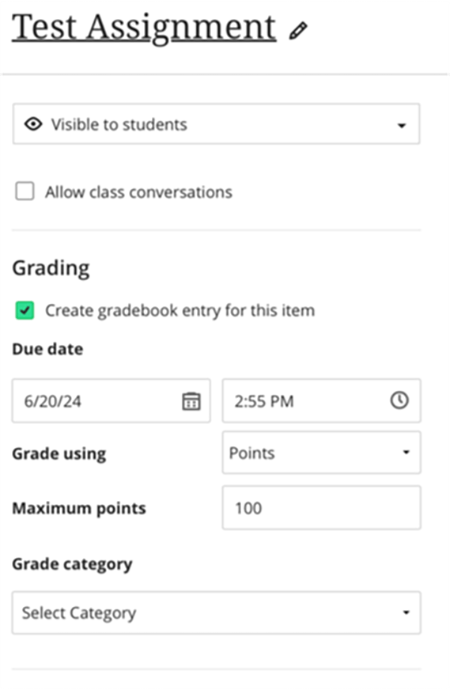
Select the pencil icon next to the title and give your assignment a unique name. Use the dropdown menu and select “Visible to Students”. Next, select “Create gradebook entry for this item” and fill in the relevant due date, the grading system you will use, maximum points, and grade category. Then, click Save. |
 |
|
Click on your link and select your Department and your Table of Contents. Please leave the Group option blank. Choose your assignment and click Save. |
 |