Watch the Video (15:16) and review the accompanying instructions.
To request that custom tags be enabled for your site, submit a Service Desk ticket. For a quicker resolution, type OU Campus in the search box and click on Website Content Management (OU Campus) in the search results. All tags are approved by the Digital Strategy team.
-
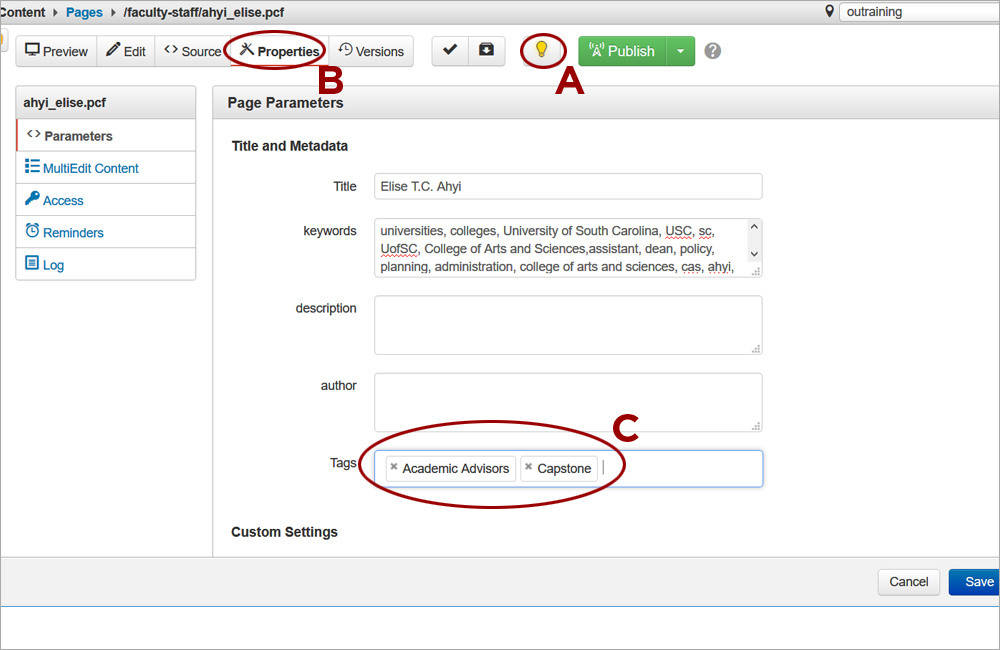
1. Add tags and publish the updated profile pages. Check out a profile page by clicking on its light bulb (A). Click on the Properties tab (B) of a profile page, add all appropriate tags (C), and save the changes. Repeat for as many pages as needed. Publish the newly tagged profile pages.
-

2. Publish the directory index page (D).
-
1. Request that the tag drop-down be enabled on the directory index page by submitting a Service Desk ticket
-
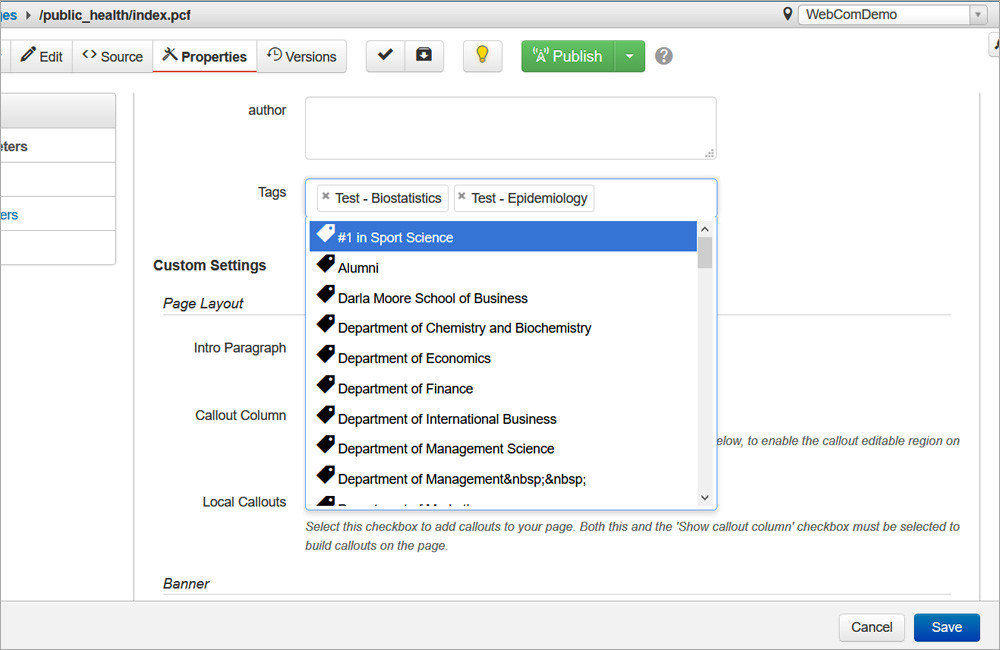
2. Once the ticket is resolved, access page properties for the directory index page and add the tags that you want to appear in the drop-down list. The drop-down list should be limited to your most requested departments, offices and centers.

-
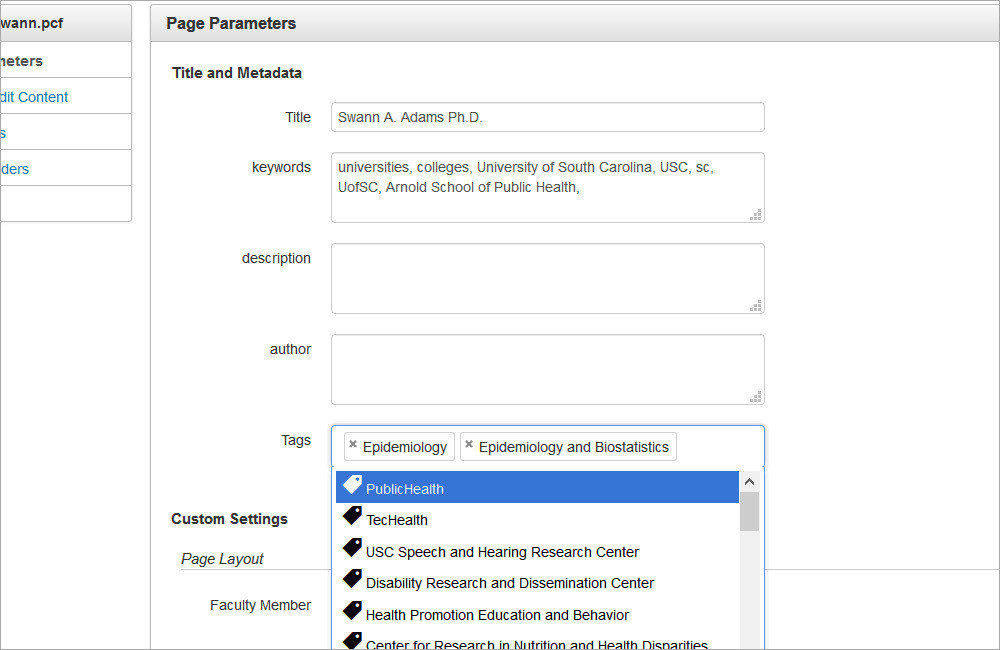
1. Add tags to the page(s) where Directory Feed snippet(s) will be used. These feed pages match the tags applied to the profiles with the tags applied to the page. If no tags are added, the feed will automatically display the entire directory. Otherwise, the feed page will ONLY display profiles associated with the same tags.
-
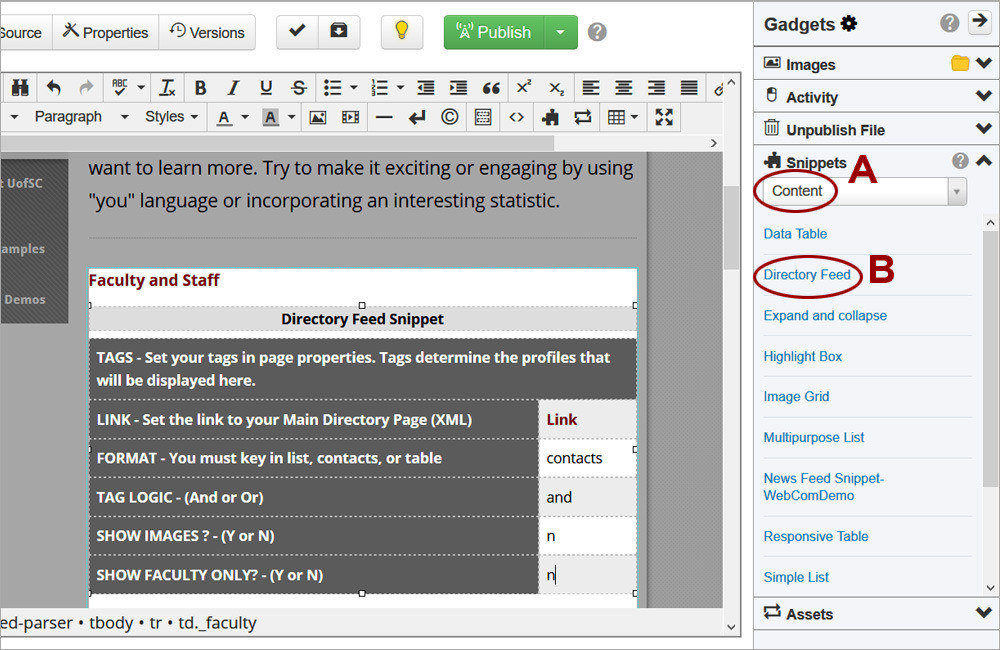
2. Access the Main editable region. Click the Gadget icon and open the Snippets gadget. Select the Content option (A) from the drop-down. Double-click on Directory Feed (B) to insert it.
-
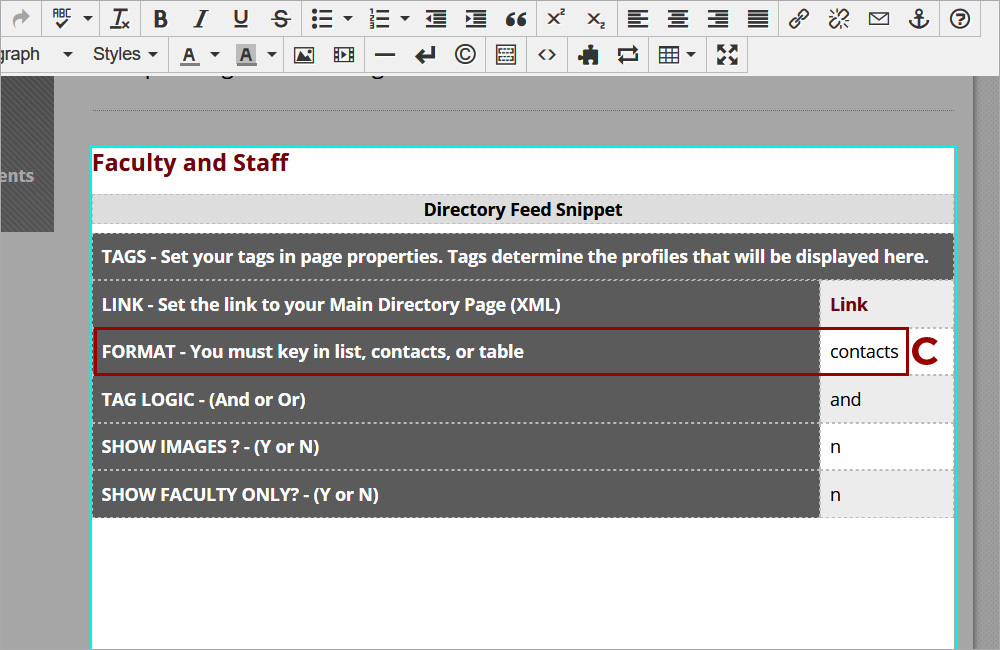
3. Choose a format option: type list, contacts, or table (C):
-
list - renders the snippet in List view, requires that the Bio field has been updated via the MultiEdit editable region for each of the profile pages being pulled in
-
contacts - renders the snippet in Contact view including name, email, phone, and primary title
-
table - renders the snippet in Table view including name, email, phone, and primary title
-
-
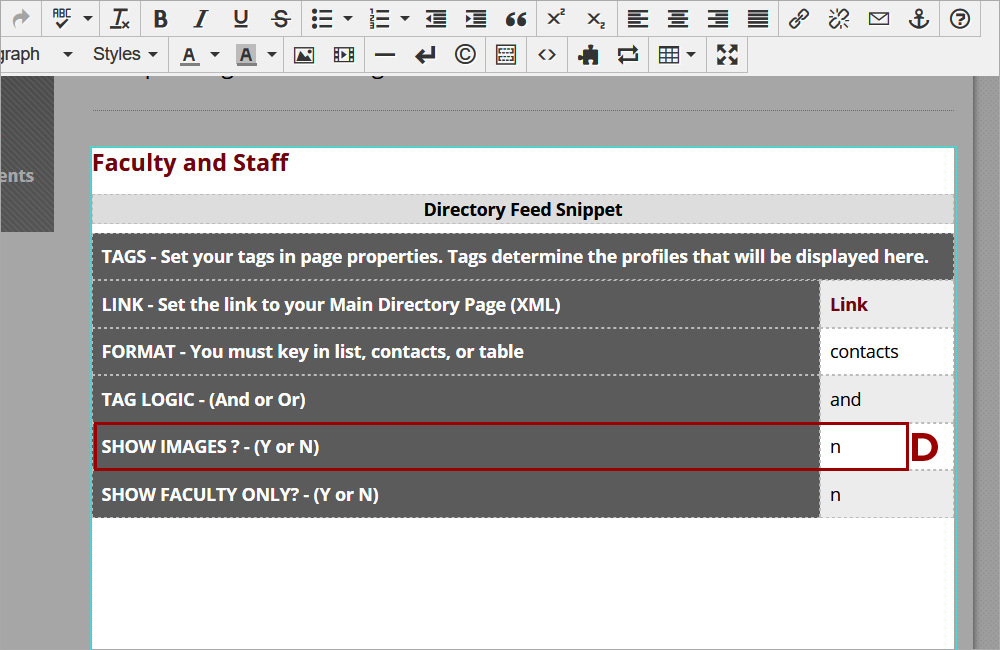
4. Choose whether to display or hide the profile images. Type y or n respectively in the SHOW IMAGES (D) row of the snippet.
-
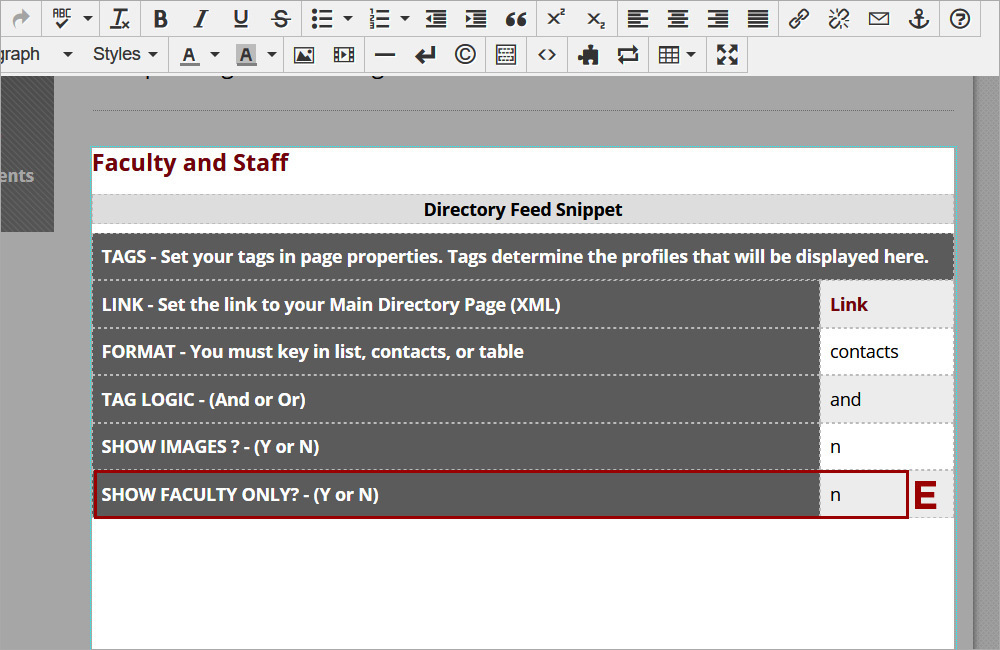
5. Choose whether to display ONLY faculty profiles. Type y or n respectively in the SHOW FACULTY ONLY (E) row of the snippet.
-
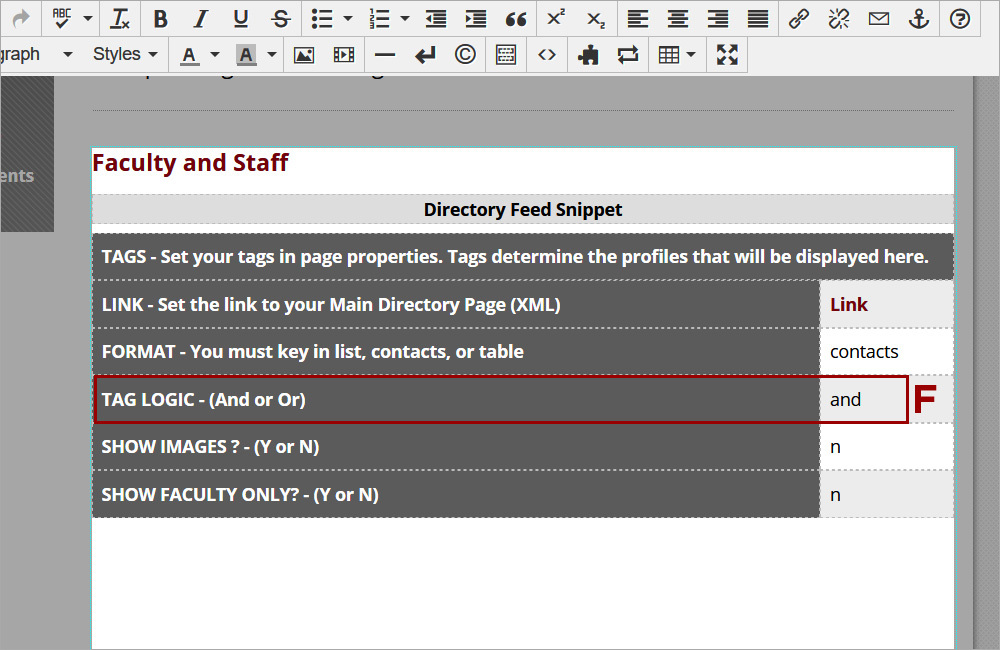
6. Determine the logic of how multiple tags are used together - type and or or for TAG LOGIC (F):
-
and - will pull profiles with ALL specified tags. For example if you have the Electrical Engineering and Research tags selected, it will pull people who have both of those tags, but not those that only have one. This option is more selective.
-
or - will pull profiles with ANY specified tags. For example if you have the Biostatistics and Epidemiology tags selected, it will pull people who have either of those tags. This option is more inclusive.
-
-
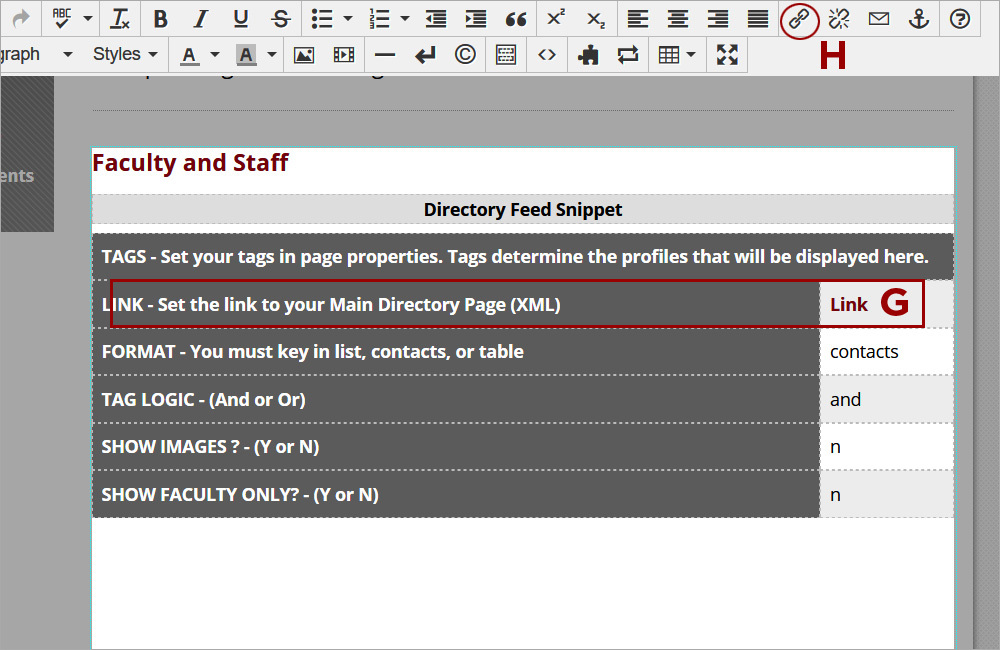
7. Place the cursor in the Link placeholder (G) text and click on Insert/Edit Link (H).
-
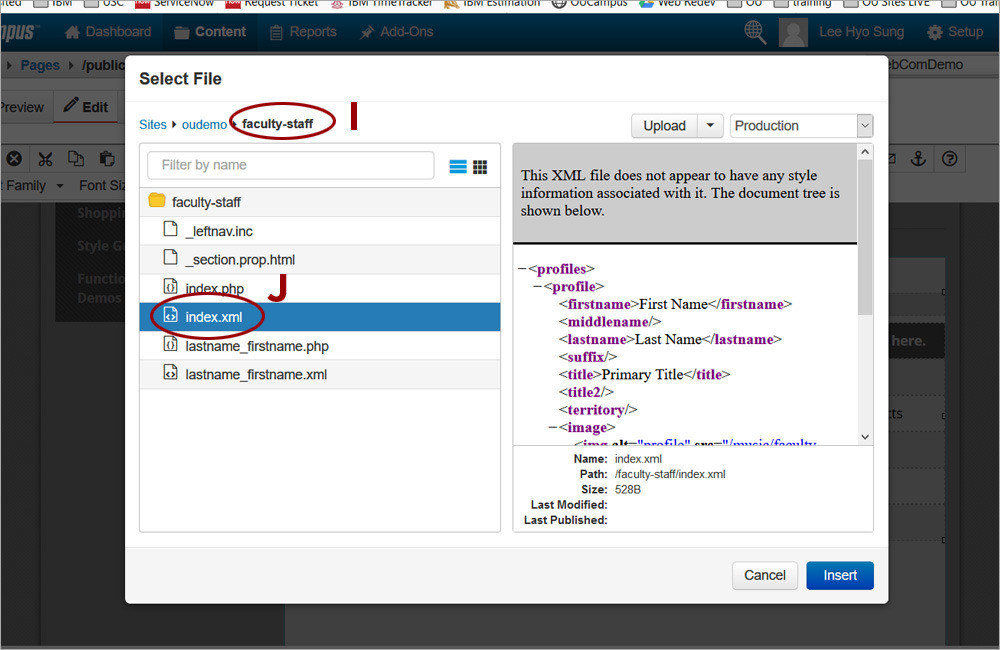
8. Navigate to the main directory page (I) and click Insert. In the Select File window, select the index.xml product (J) and click Insert.
-
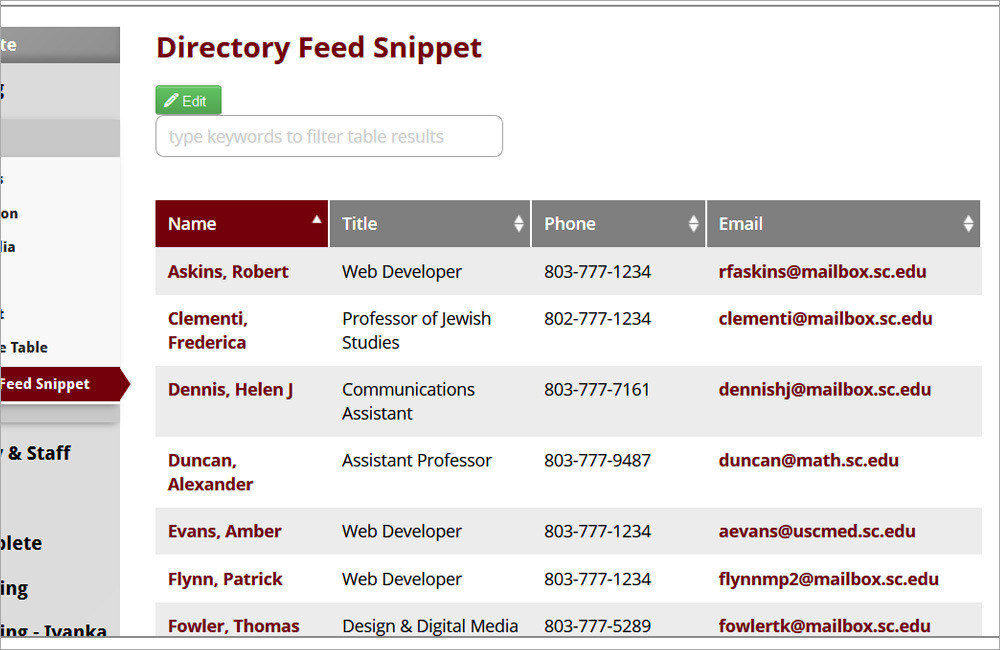
9. Save the changes and preview the Directory Feed snippet.
-