Watch the Video (09:39) and review the accompanying instructions.
-
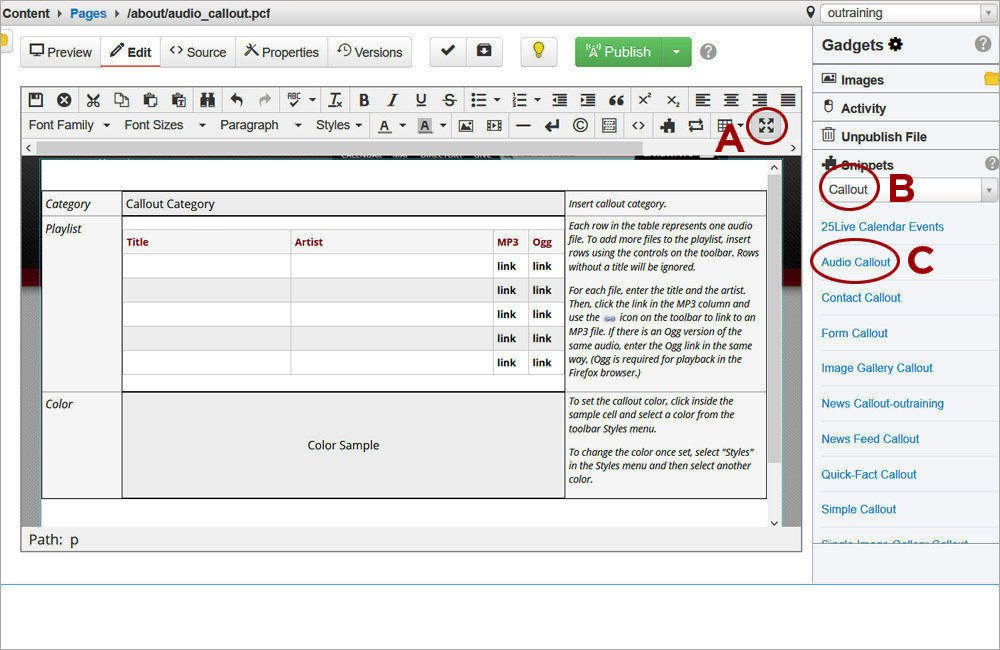
1. Access the Callout editable region and click the Maximize Content Region icon (A). Click the Gadget icon and open the Snippets gadget. Select the Callout option (B) from the dropdown. Double-click on Audio Callout (C) to insert it.
-
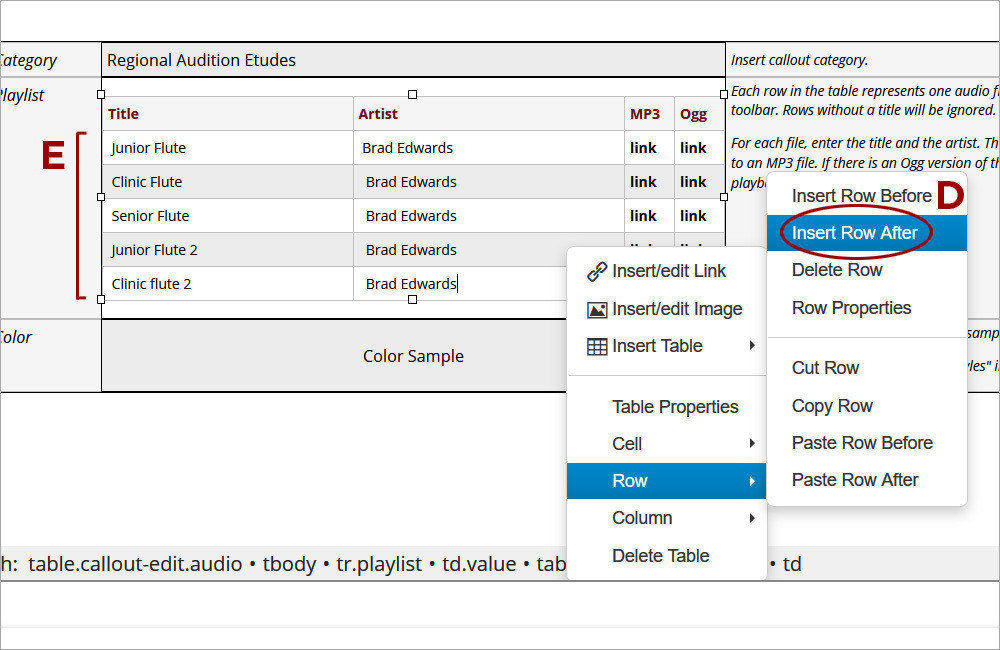
2. Provide a Category. If more than 5 items will be added to the Playlist, place the cursor in the table inside the Playlist row, right-click and select Row->Insert Row After (D). Limit your playlist to 6 tracks or fewer. For each track, provide text in both the Title and Artist cells (E) or the track will not render.
-
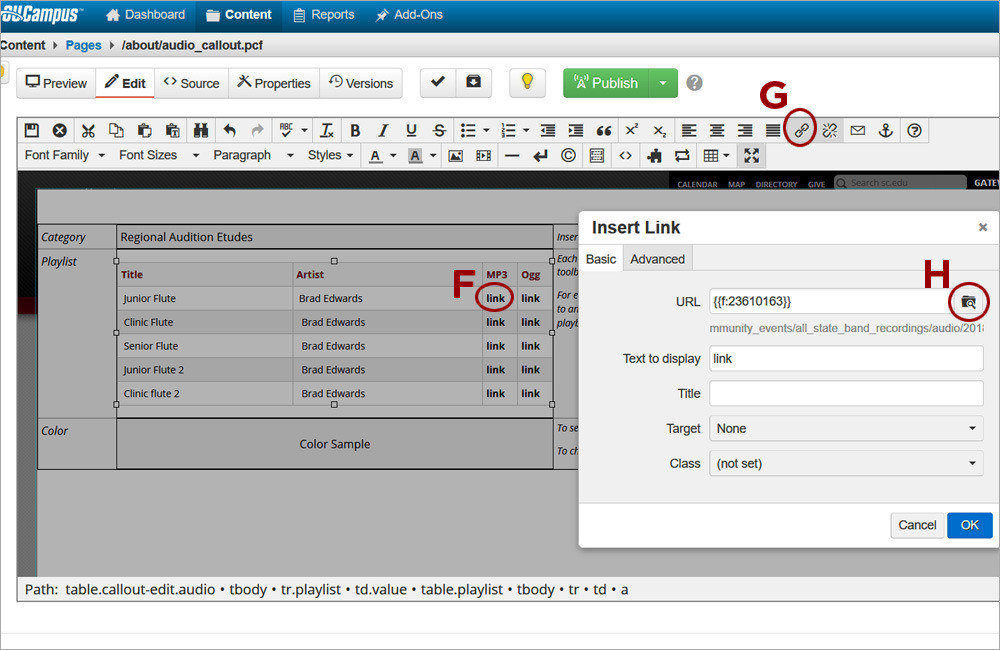
3. Audio files should be uploaded to a third-party host such as Kaltura although they can also be uploaded directly to the OU Campus site once permission has been granted by the OU Campus Administrator. For each track, highlight the link placeholder text under the MP3 column (F) and click on the Insert/Edit link tool (G). Paste the audio link in the URL text box or click on the Browse button (H) to navigate to the audio file in OU Campus. Do NOT update the link in the Ogg column or the audio file will not render.
-

4. Select a color for the callout from the Style dropdown (I).
-
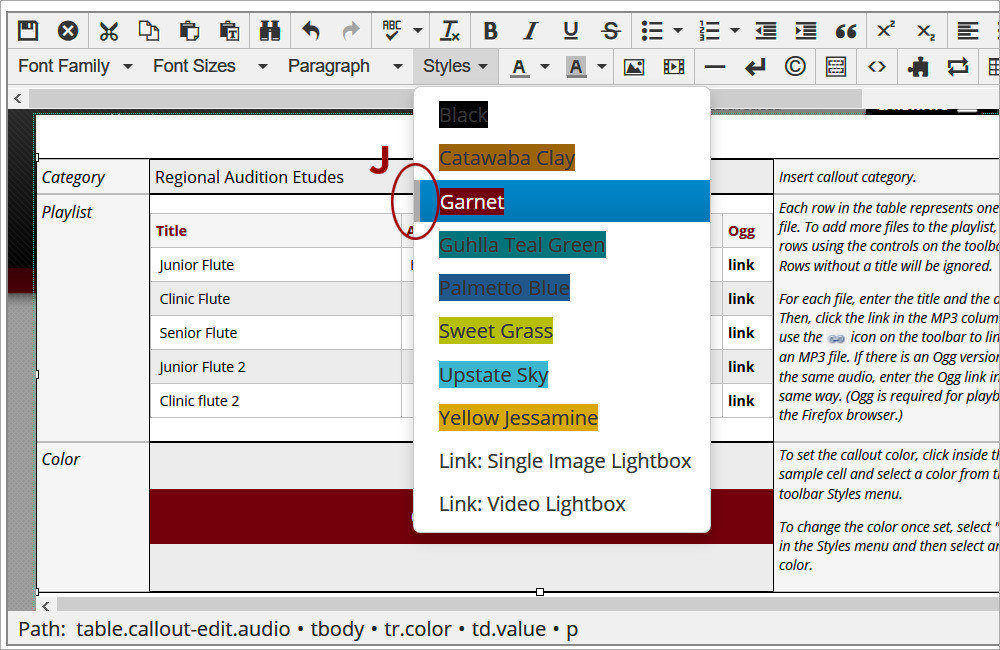
5. When changing the color for the callout, make sure to select the current color first to clear it and then select the new color from the Styles dropdown. Only one color should be selected at a time. The vertical gray bar (J) next to the color listing indicates what color(s) are selected.
-
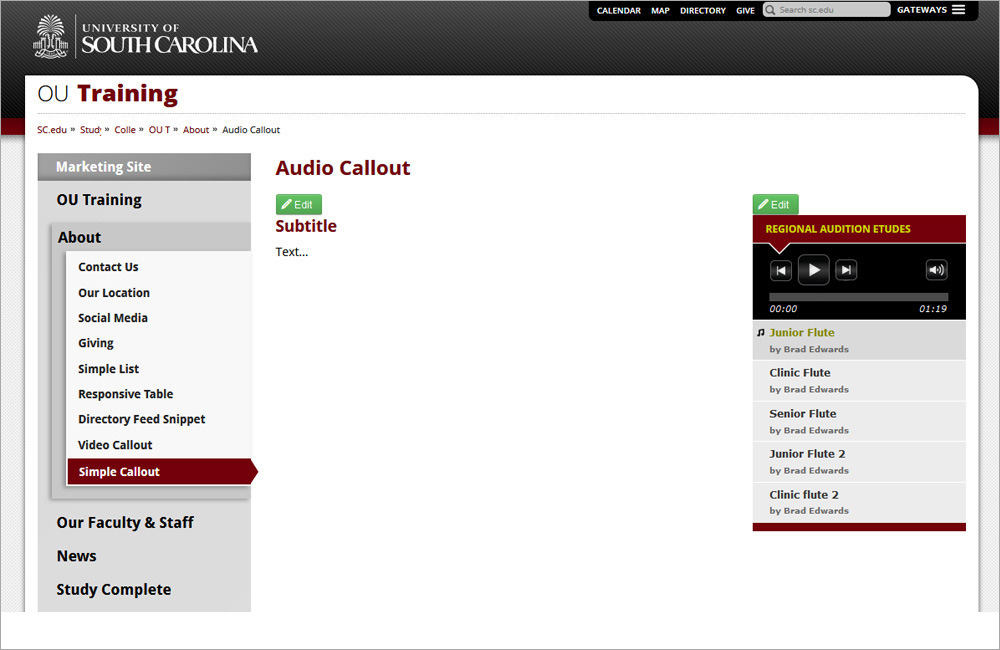
6. Save the changes to preview the Audio Callout.