Watch the Video (16:29) and review the accompanying instructions.
-
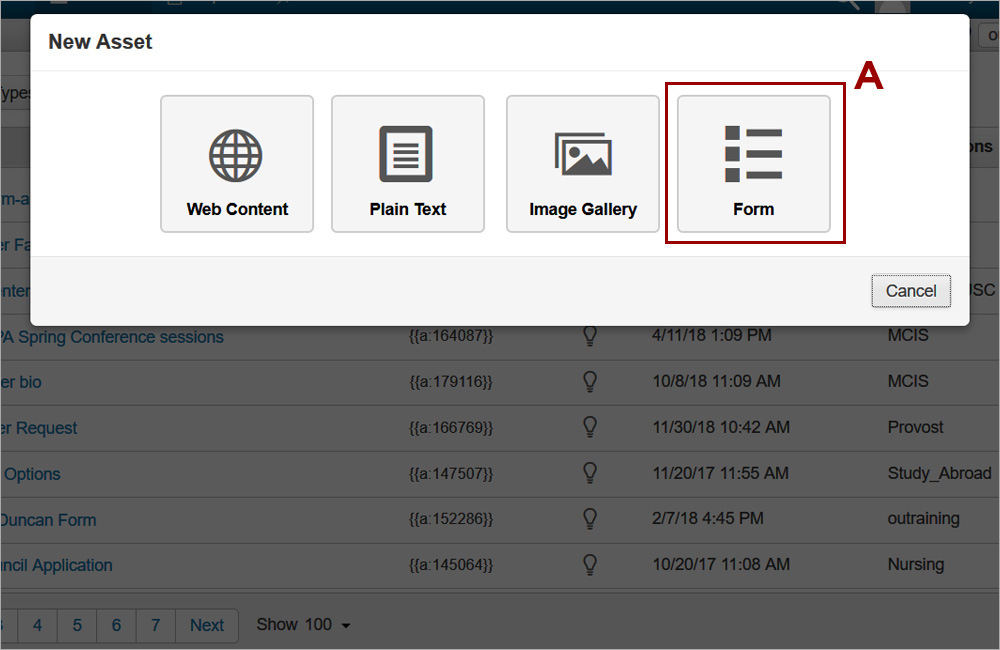
1. Create a form asset via the Asset Manager. Hover over the Content tab in the blue ribbon and select Assets. Click the green New button. The list of asset types will appear. Click on the Form (A) asset in the list.
-
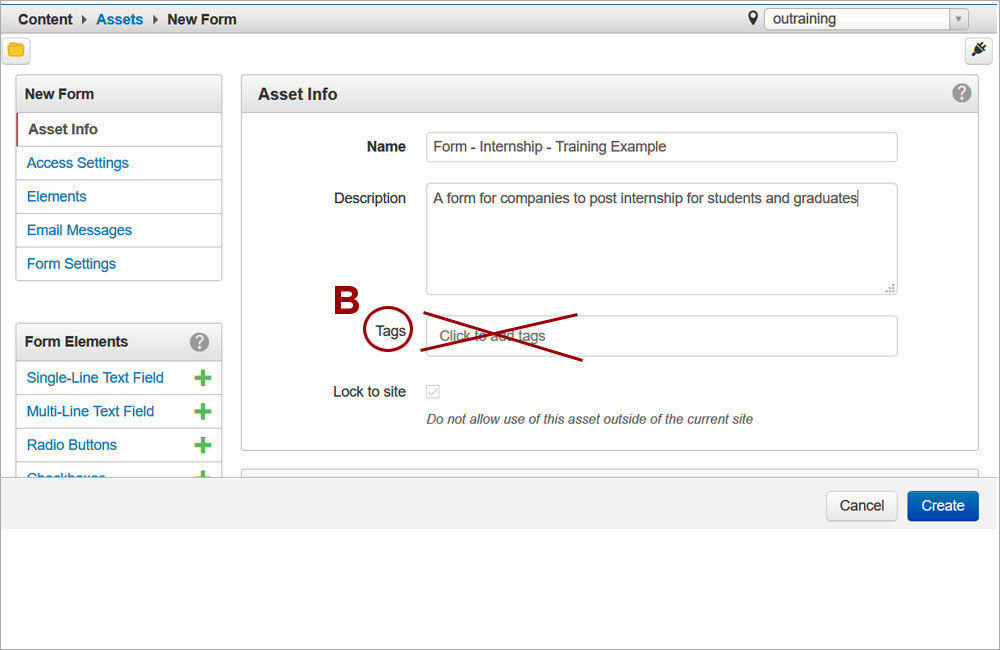
2. Provide a name and description for the asset but do NOT select any tags (B). Make sure that the name is descriptive enough so that you can easily identify the asset later on when inserting it on the page. Assets cannot be organized by folders like pages.
-
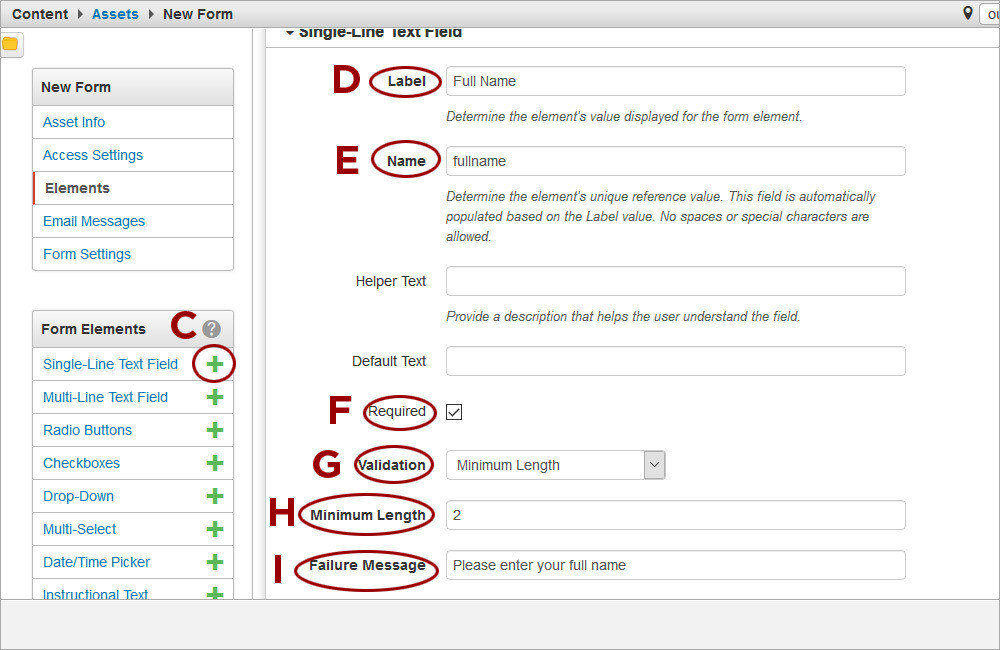
3. Click on the + sign (C) for each of the field types you would like to add. For each field, provide a Label (D). The Name attribute (E) of the field will be automatically generated. Select the Required checkbox (F) if you wish to make the field required. If you wish to validate the field, select an option from the Validation dropdown (G). Fill out the validation rule for the Minimum Length (H) and Regular Expression options. If the field is required or being validated, provide a Failure Message (I).
-
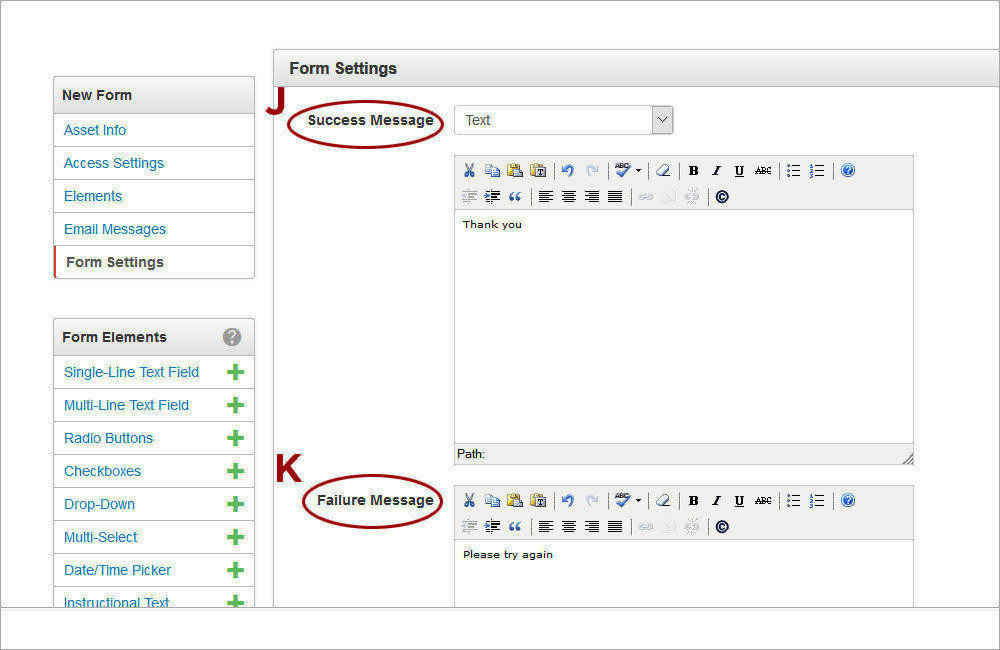
4. Provide a Success and Failure Message for the form. The Success Message (J) will display on the same page in a green background when the form is submitted successfully. If the URL Redirect option is selected from the Success Message dropdown, the user will be redirected to the selected page when the form is submitted. The Failure message (K) will display on the same page in a red background when the form submission fails.
-
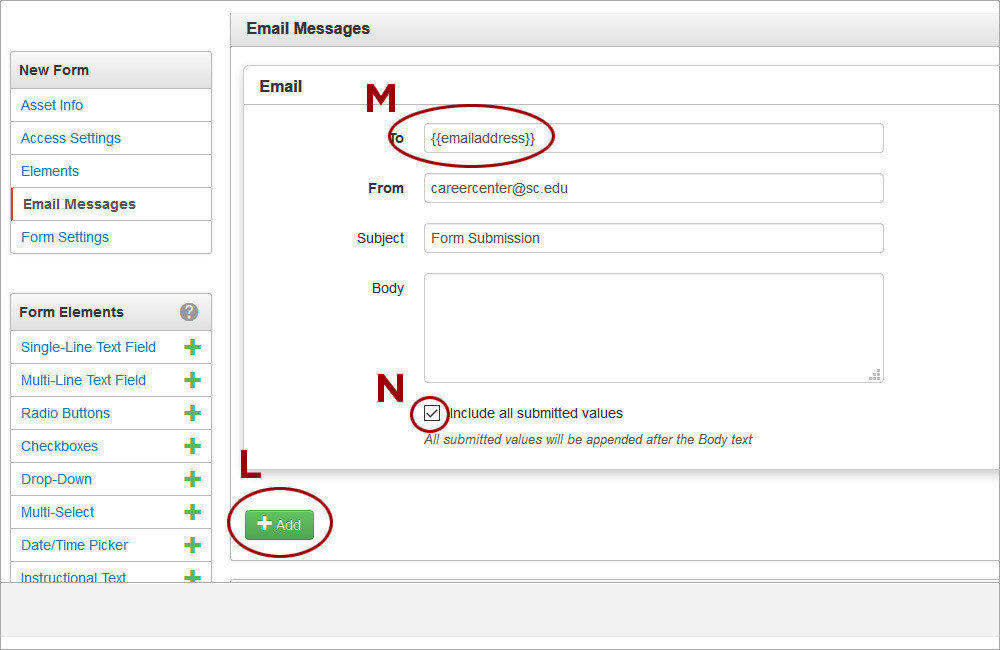
5. Setup one or more email messages that will be sent when the form is submitted successfully. Click the Add button (L) in the Email Messages section. In the To field, provide one or more email addresses separated by semi-colon. If an email address is provided on the form, it can be used to send a confirmation to the person submitting the form. For that purpose, the Name attribute of the email address field should be enclosed by double curly brackets (M). Add Subject for the email and select the Include All Submitted Values checkbox (N) to append the submitted information on the form to the body of the email message. Save and publish the asset.
-

6. Click on the Content tab in the blue ribbon and navigate to the page where the form will be displayed. Access the Callout Editable Region and click the Maximize Content Region icon (O). Place the cursor in the white area of the editable region and press Enter. Click the Gadget icon and open the Snippets gadget. Select the Callout option (P) from the dropdown. Double-click on Form Callout (Q) to insert it.
-
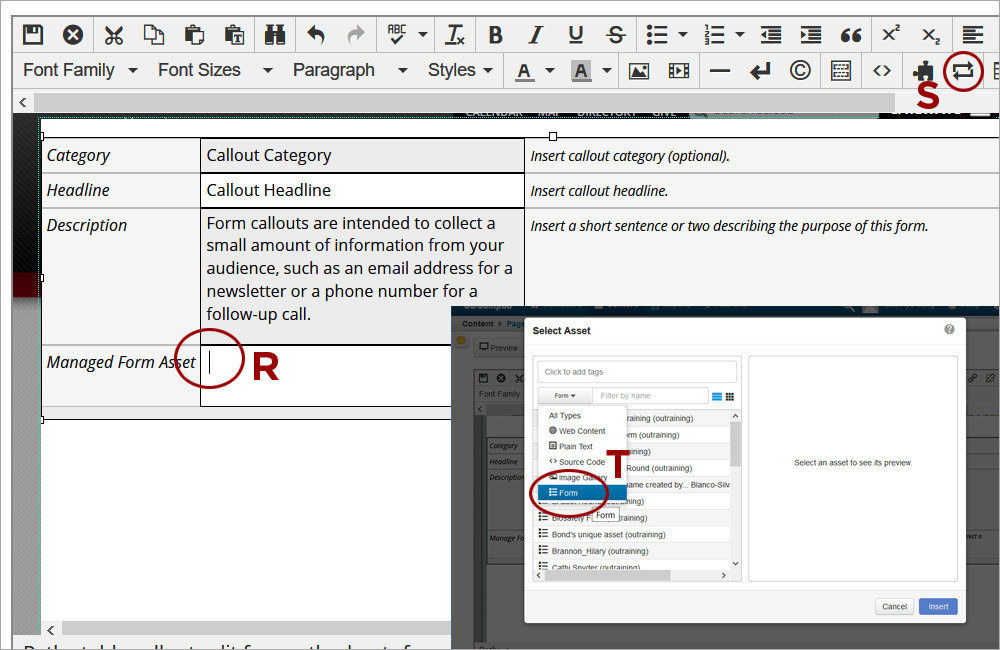
7. Fill out Category, Headline, and Description. Place the cursor in the white cell of the Managed Form Asset row (R) and click on the Insert Asset tool (S) to insert the form asset that was created earlier. In the Select Asset window, select Form (T) from the dropdown to narrow down the selection. Assets can further be filtered by keywords based on the Name field of the Asset. Click on the asset to insert it. Save the changes.
-
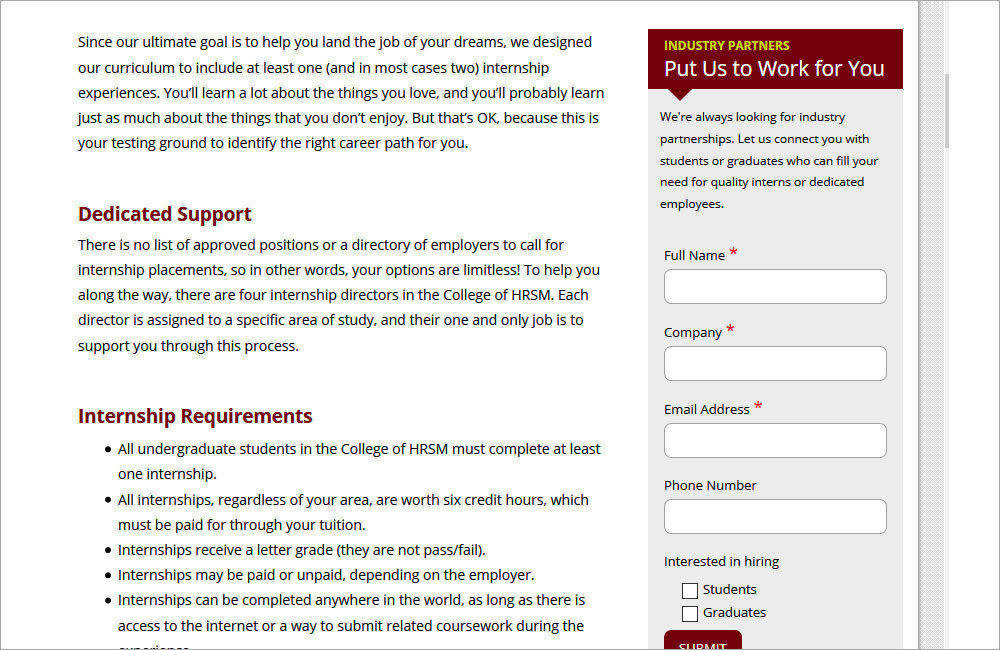
8. Publish the page and click on the "View in new window" link to open a new tab with the published page outside OU Campus. Fill out the form and click Submit to test it.
-
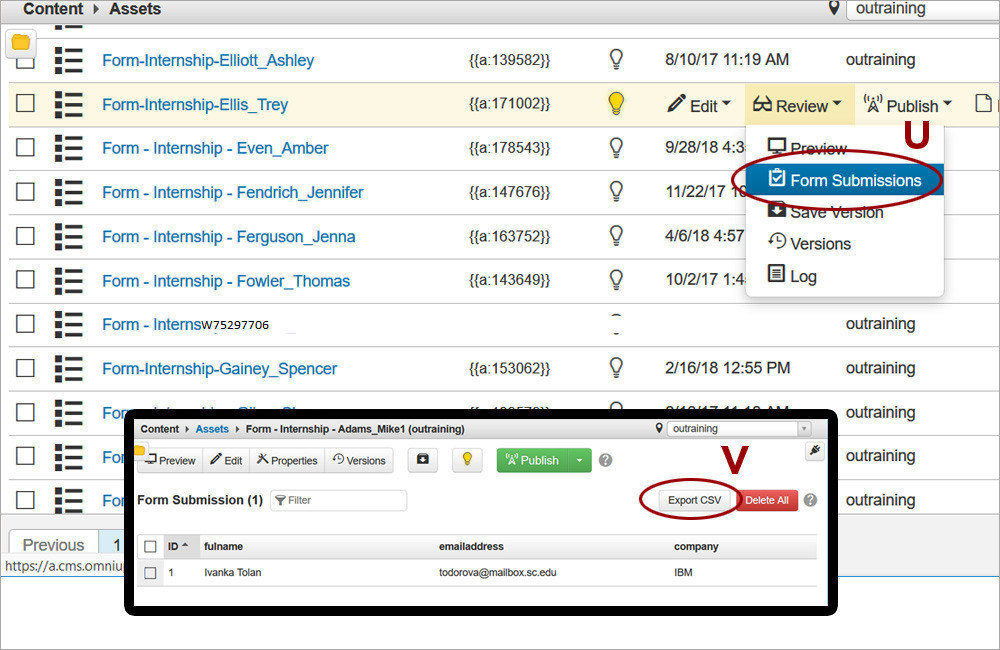
9. To view the form submissions, hover over the form asset and select Form Submissions (U) . The form results will appear and they can also be exported as a CSV file after clicking on the Export CSV (V) button.
-
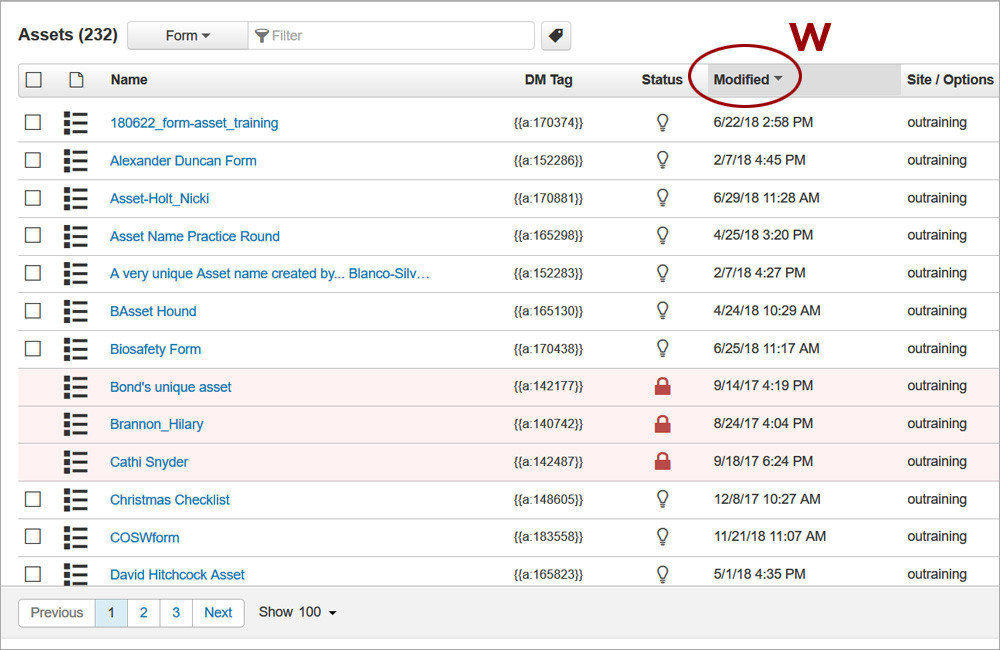
10. To edit the form, navigate to the Asset Manager again selecting the Assets option from the Content tab in the blue ribbon. Click on the Modified column (W) to sort the assets with the most recent ones appearing at the top.
-
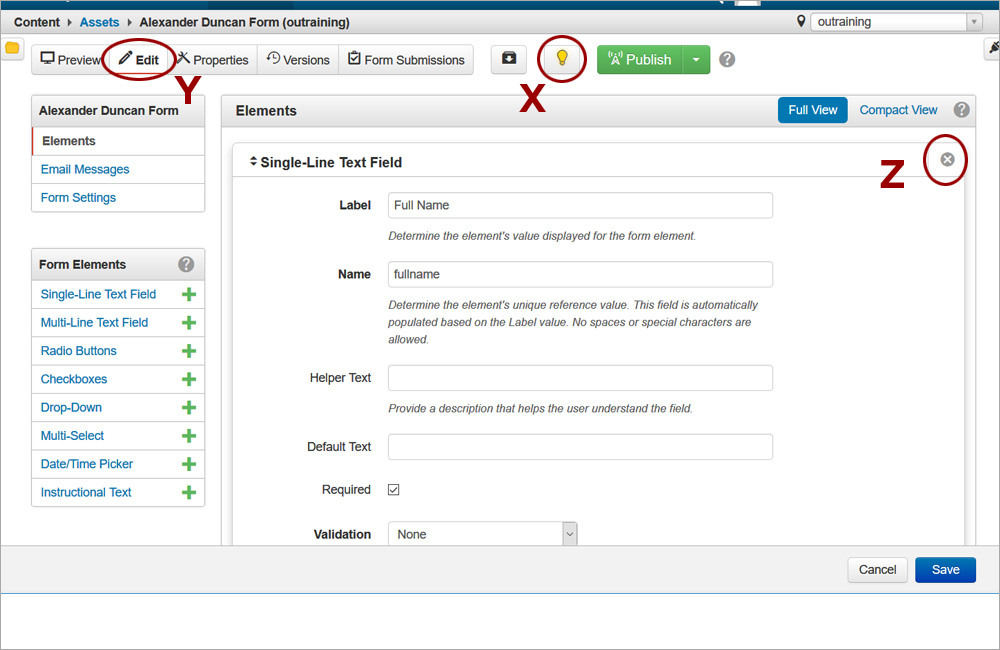
11. Click on the asset and then on its light bulb (X) to check it out. The Edit tab (Y) will appear. Click on it to begin updating the asset. Fields can be dragged to a different order on the form or deleted entirely by clicking on the X (Z) in the right corner of the field. Don't forget to publish the asset when finished for the changes to take effect.
-