Watch the Video (07:58) and review the accompanying instructions.
-

1. Access the Callout Editable Region and click the Maximize Content Region icon (A). Place the cursor in the white area of the editable region and press Enter. Click the Gadget icon and open the Snippets gadget. Select the Callout option (B) from the dropdown. Double-click on Contact Callout (C) to insert it.
-
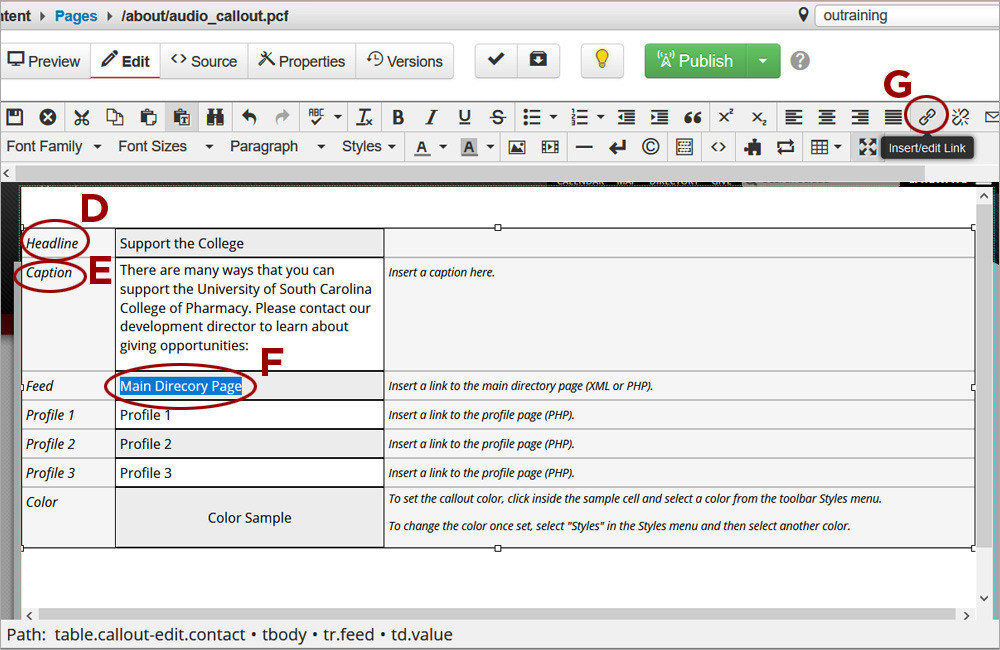
2. Update the default Headline (D) if necessary and provide text in the Caption row (E). Highlight the placeholder text Main Directory Page (F) and click on Insert/Edit Link (G). Click Browse and navigate to your faculty-staff directory section.
-
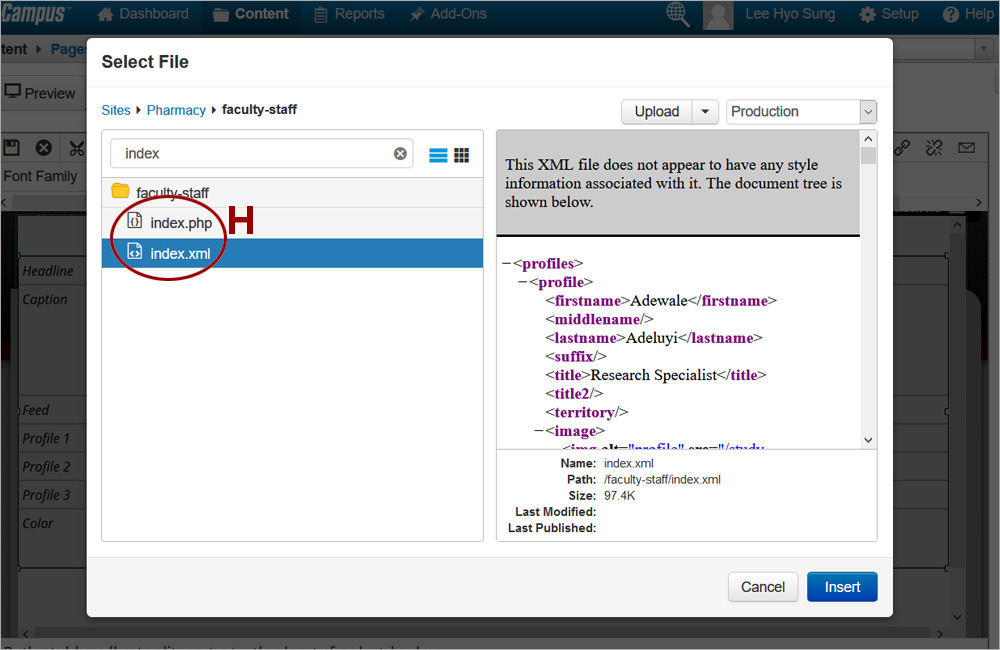
3. Type "index" in the filter box to easily locate the main directory page and select either the .php pr . xml page product (H). Click Insert and then Ok.
-
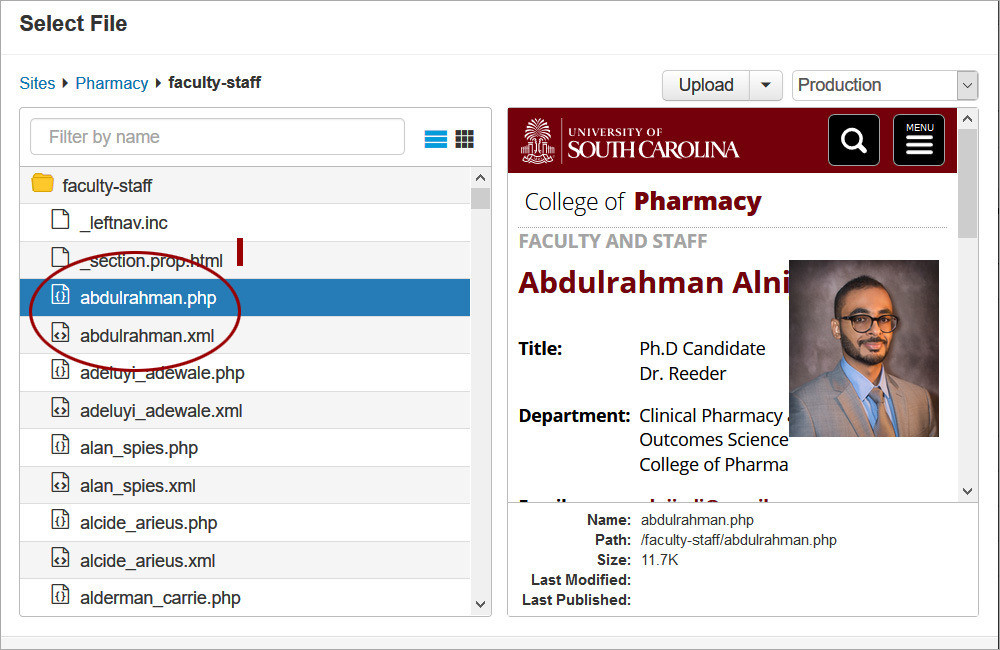
4. Highlight the Profile1 placeholder text and click on the Insert/Edit link tool. Click Browse and navigate again to your faculty-staff directory section. Locate the profile page and select either the .php pr . xml page (I) product. Repeat for additional two profile links to display the contact information for up to 3 faculty or staff profiles.
-
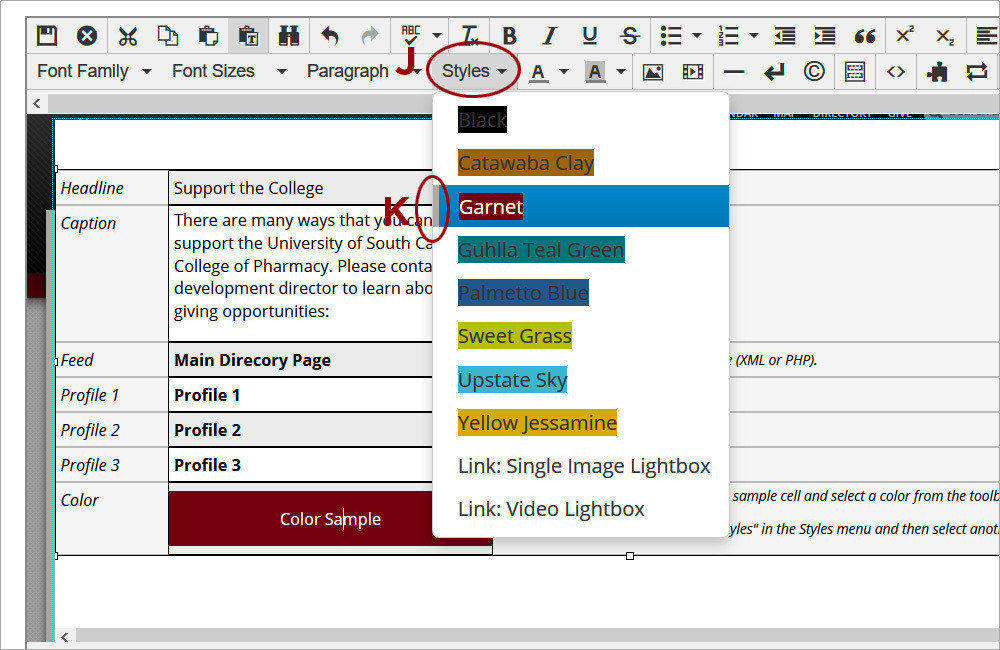
5. When changing the color for the callout, make sure to select the current color first from the Style dropdown (J) to clear it. Then select the new color. Only one color should be selected at a time. The vertical gray bar (K) next to the color listing indicates what color(s) are selected.
-
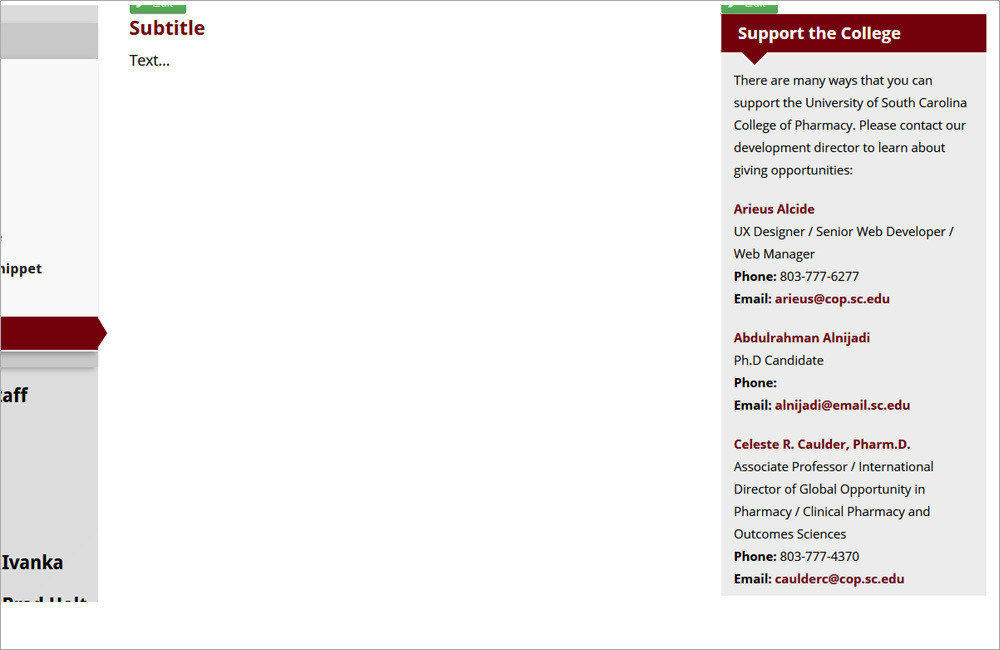
6. Save the page to preview the Contact Callout.