Watch the Video (14:52) and review the accompanying instructions below.
-
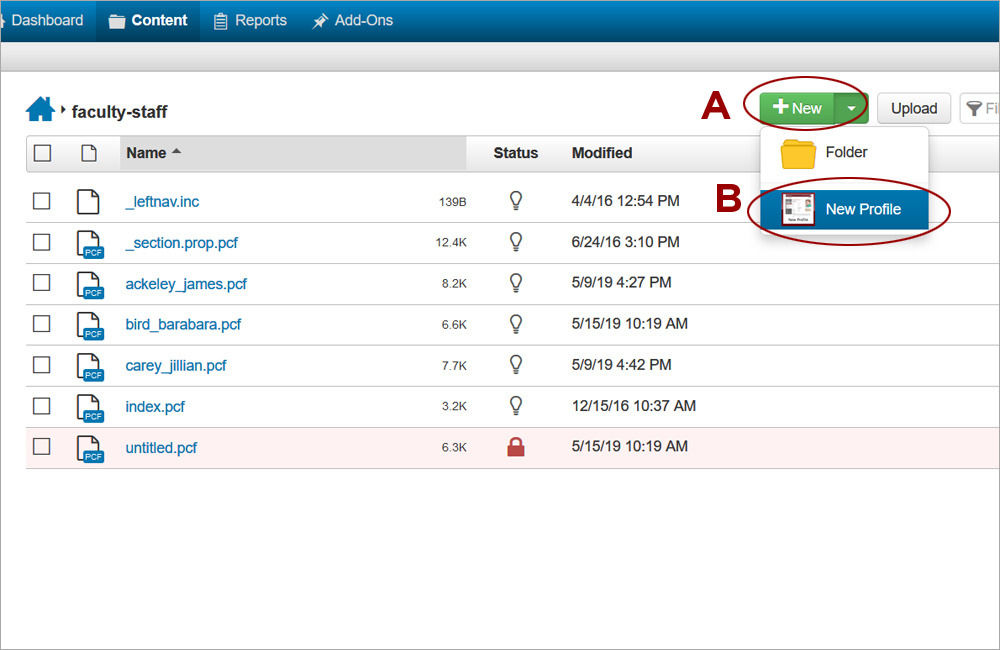
1. Navigate to the directory section for the site and select the New Profile template. Click New (A) and then New Profile (B)
-
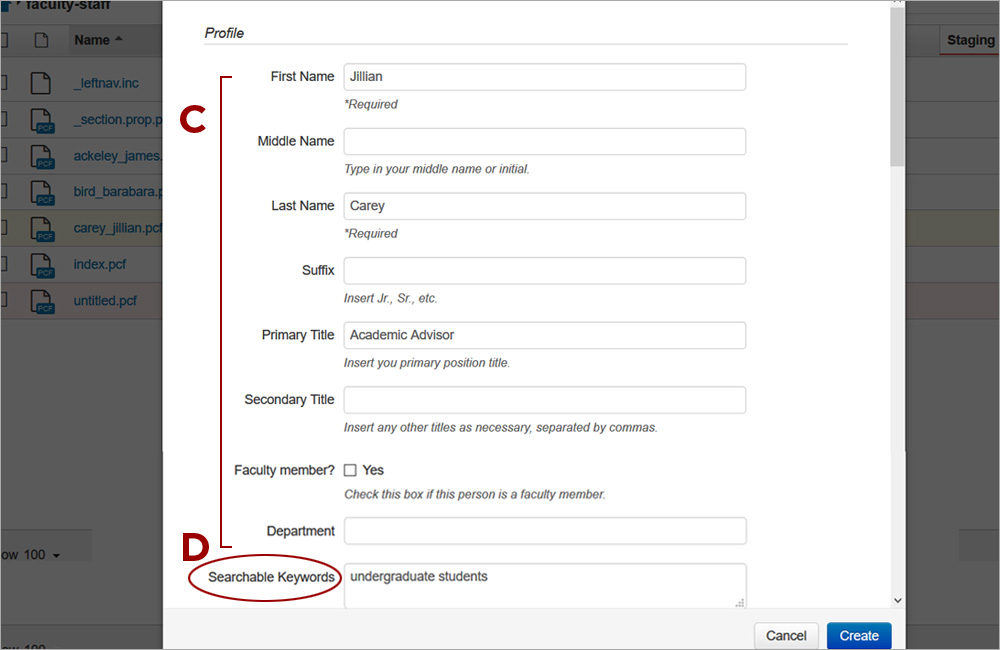
2. Fill out the contact information (C) for the profile page. Middle Name, Suffix, Secondary Title, and Department are optional. Provide additional keywords that are not included in the Title or Department field in Searchable Keywords (D) to add more searchable filters to the Directory Listing Page.
-
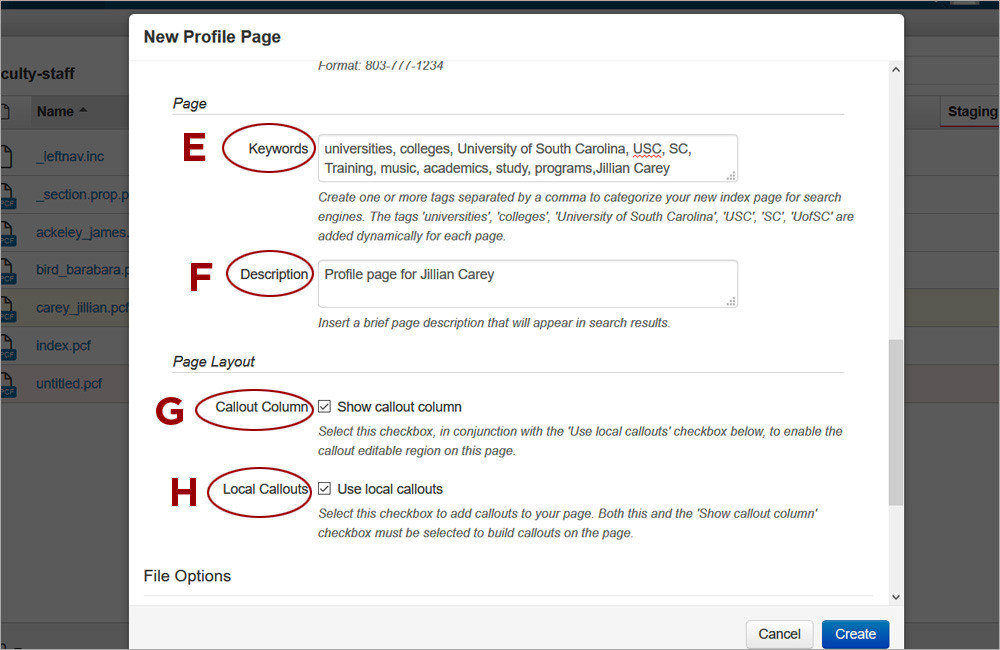
3. Generate the meta data that will be read by search engines. Add Keywords (E) and Description (F), they can simply use the name for the profile. Select Callout Column (G) and Local Callouts (H) check boxes to enable the callout editable region or leave them unchecked.
-
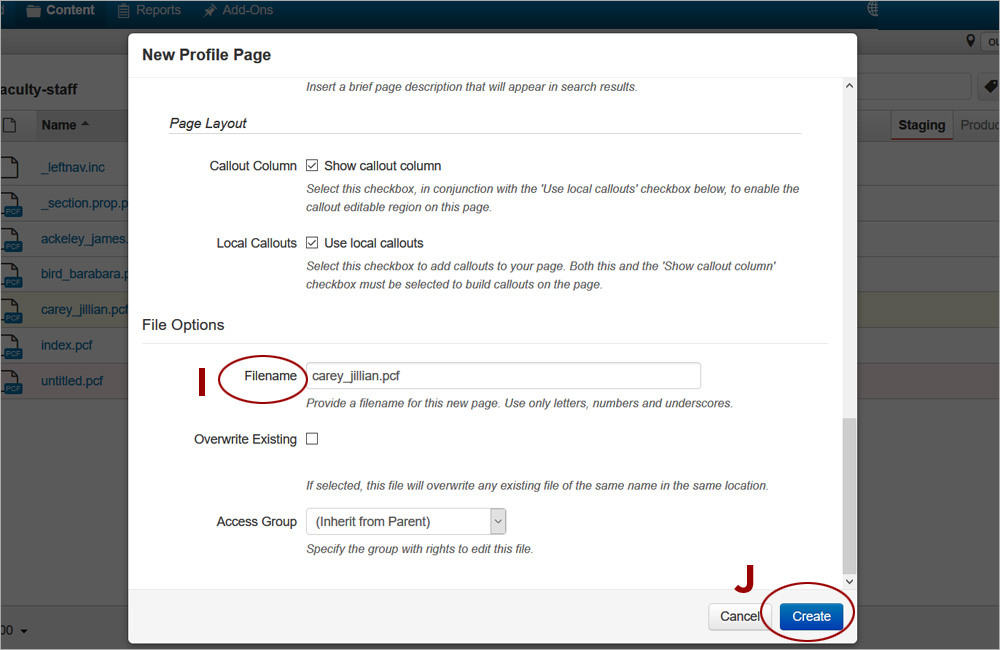
4. Provide Filename (I) for the profile page and click Create (J). The file name should be lowercase, with no spaces or special characters.
-
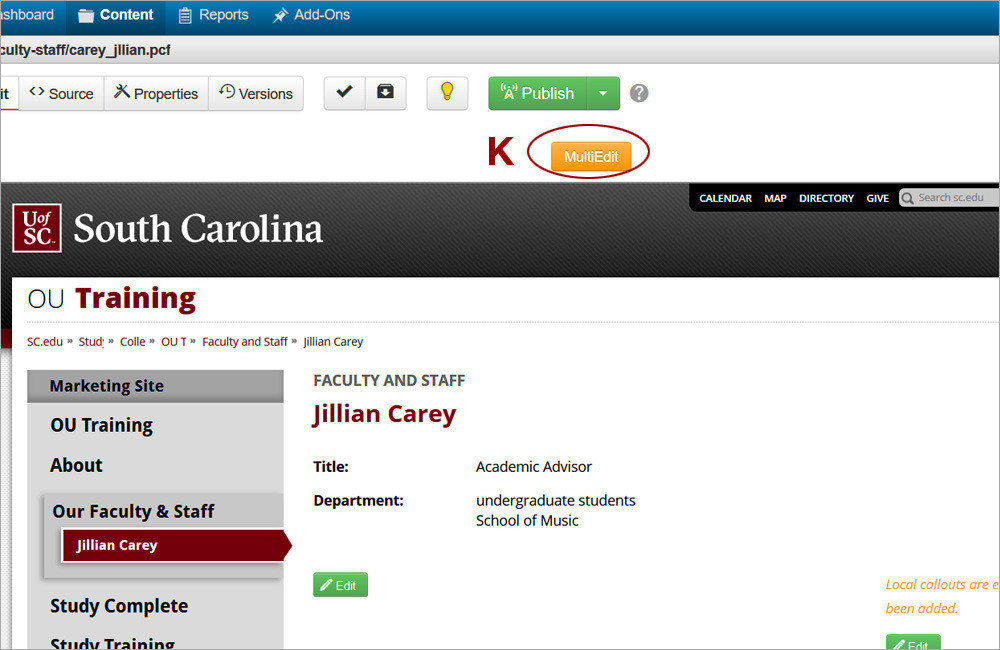
5. Once the page is created, additional structured content and a profile photo can be added to appear at the top of the page. Click on the orange MultiEdit button (K) to access the MultiEdit form with these additional options.
-
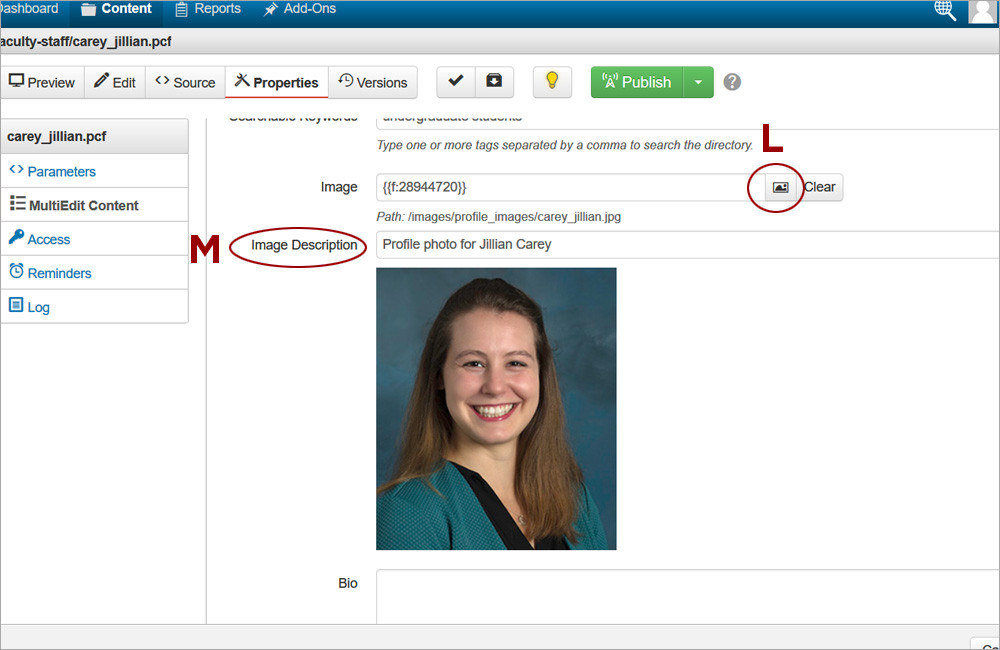
6. To add the profile photo , click on the Image Filechooser (L) and navigate to the photo (255x300 px) that has already been uploaded to OU Campus. Provide an informative Image Description (M) to make the image accessible.
-
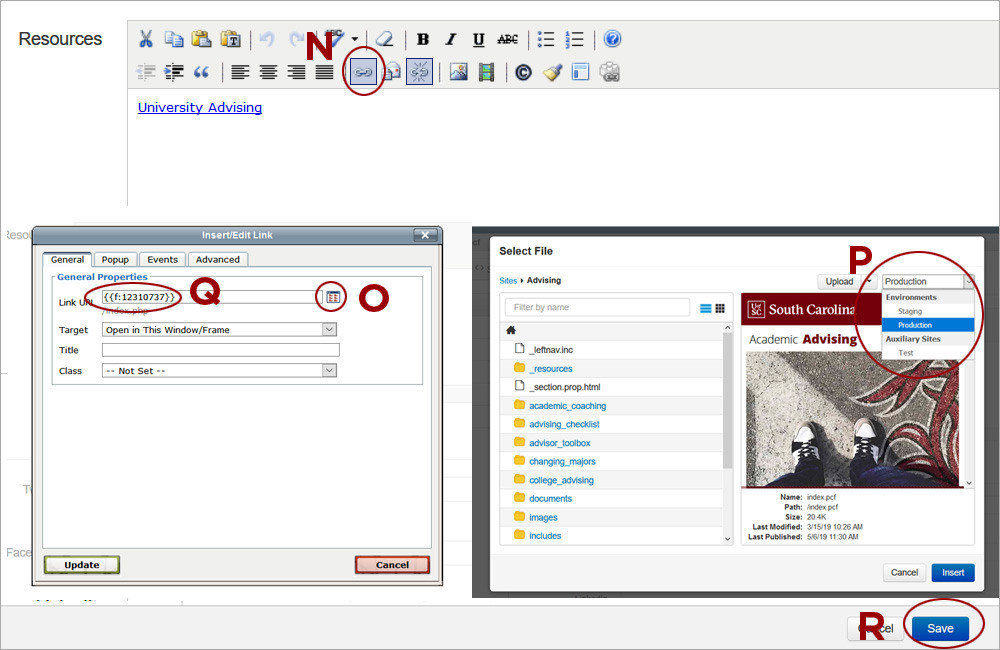
7. The rest of the structured information includes Office Address, Office Hours, Twitter, Facebook, and LinkedIn accounts. To add a Resources section with one or more hyperlinks, type the link text and click on the Insert/Edit link tool (N). If creating a link to content maintained in the University CMS, click the Browse button (O) to navigate to the content and select Production (P). If creating a link to external content, paste the web address in the Link URL (Q). Click Save (R) to save the changes.
-
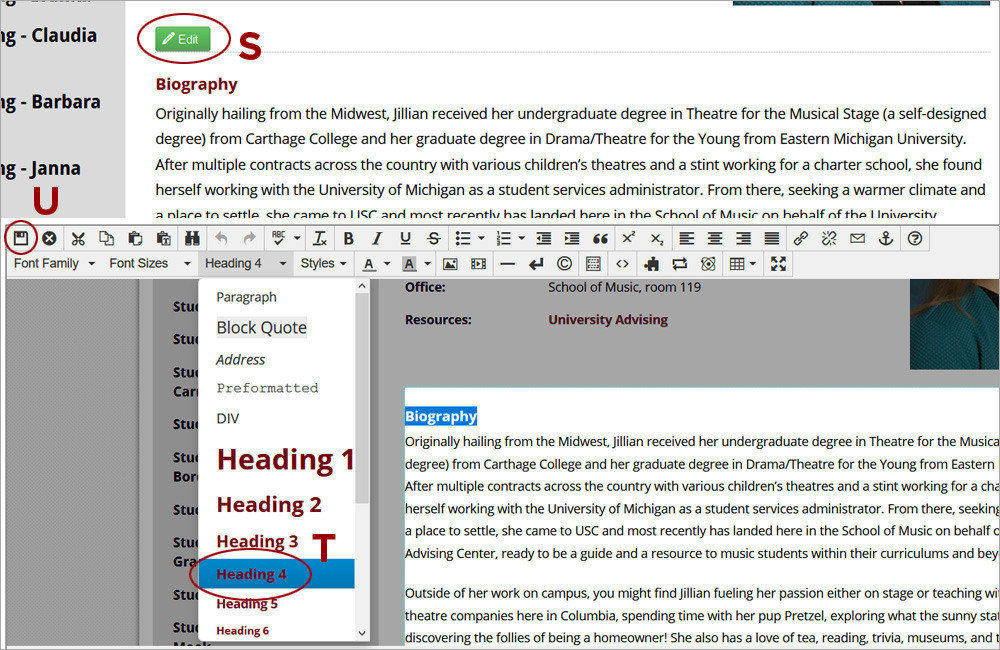
8. Add the unstructured information on the page. Click the Edit button (S) to access the main editable region. All headings should be created as a Heading 4 (T). Click Save (U) when finished adding the information.
-
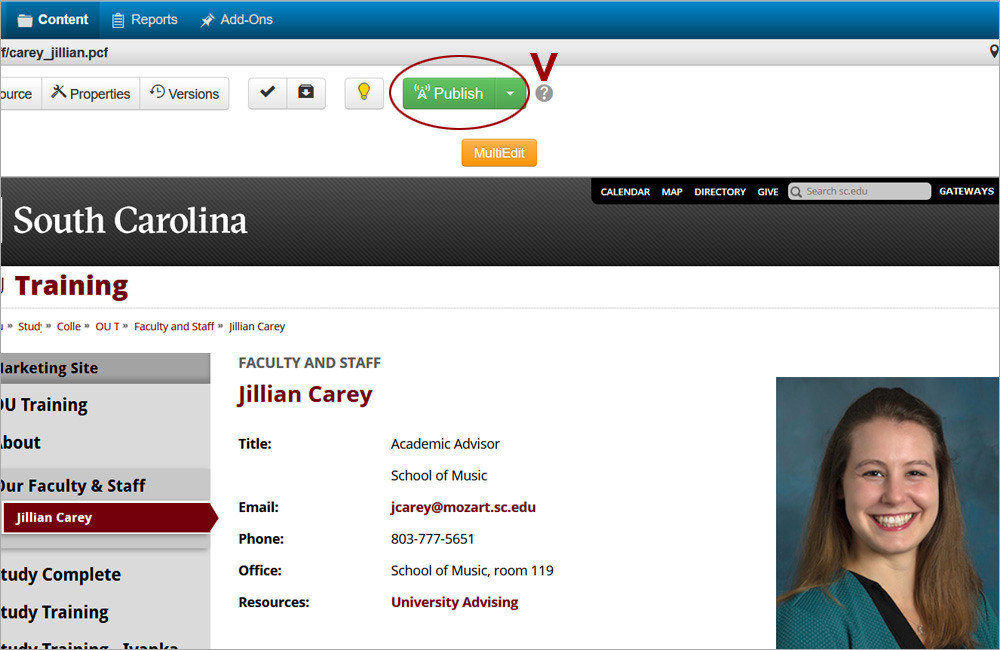
9. Publish the new profile page. Click Publish (V), select the Publish Target, provide a Version Description, and click Publish. All pages should be published to the test server first (select Test for Publish Target) and then to the Production server.
-

10. Publish the index page in the directory section to update the Directory Listing Page.