Watch the Video (10:18) and review the accompanying instructions.
-
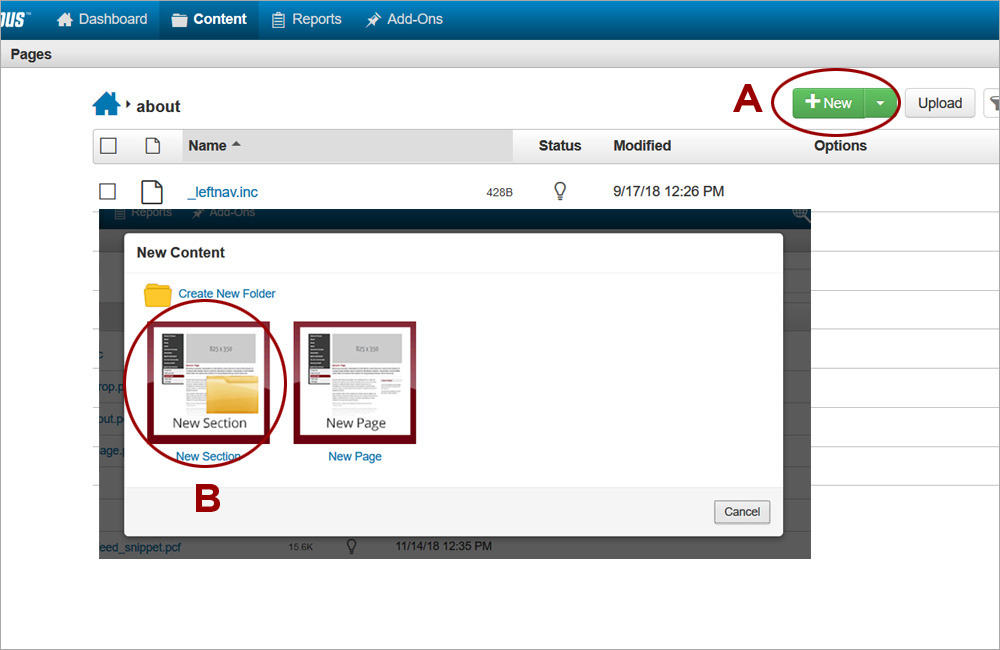
1. Navigate to the location within the site where the section should exist and that would be reflected in the left navigation. Click New (A) and select the New Section template (B).
-
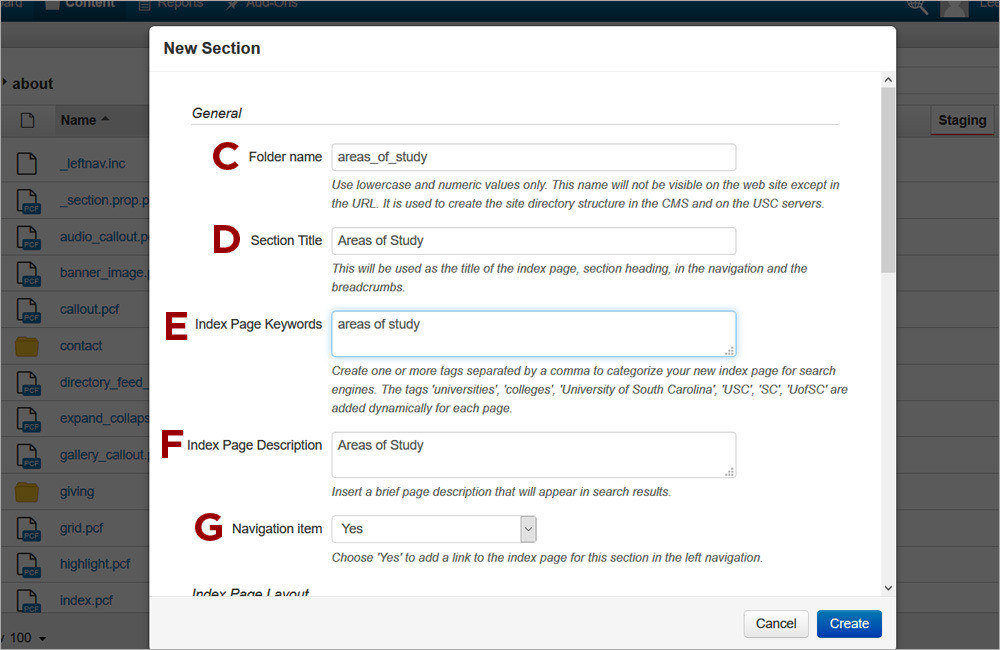
2. Fill out the information in the General section of the wizard.
- Folder Name (C) - used to create the site directory structure. It is NOT visible except in the web address for the section. Should be lowercase, with no spaces or special characters.
- Section Title (D) - used to create the following three elements visible on the web site
- Page title for the new section index page
- Section breadcrumb
- Link text in the left navigation
- Index Page Keywords (E) - add one or more keywords describing the new section to add Meta tags
- Index Page Description (F) - add text to create the Meta tag description
- Navigation Item (G) - select "Yes". No sections should be hidden from the left navigation.
-
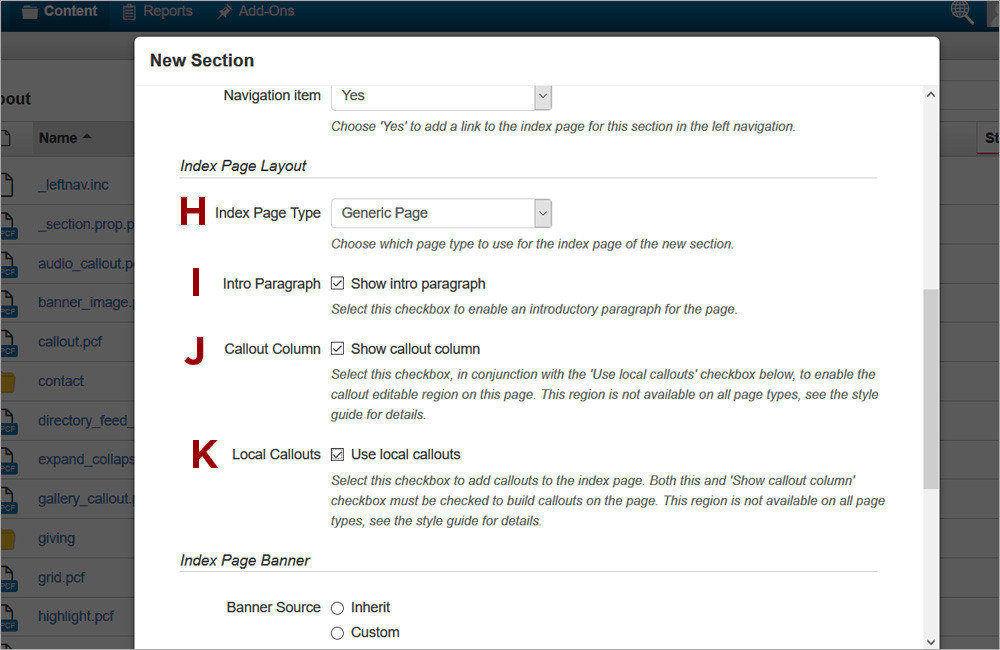
3. Fill out the Index Page Layout section of the wizard.
- Index Page Type (H) - select the type of the index page. All page types can be created as a generic page after inserting the respective content snippet in the main editable region.
- Intro Paragraph (I) - select to enable the intro paragraph region or leave unchecked to hide it.
- Callout Column (J) and Local Callouts (K) - select both checkboxes to enable the callout editable region or leave unchecked to hide it.
-
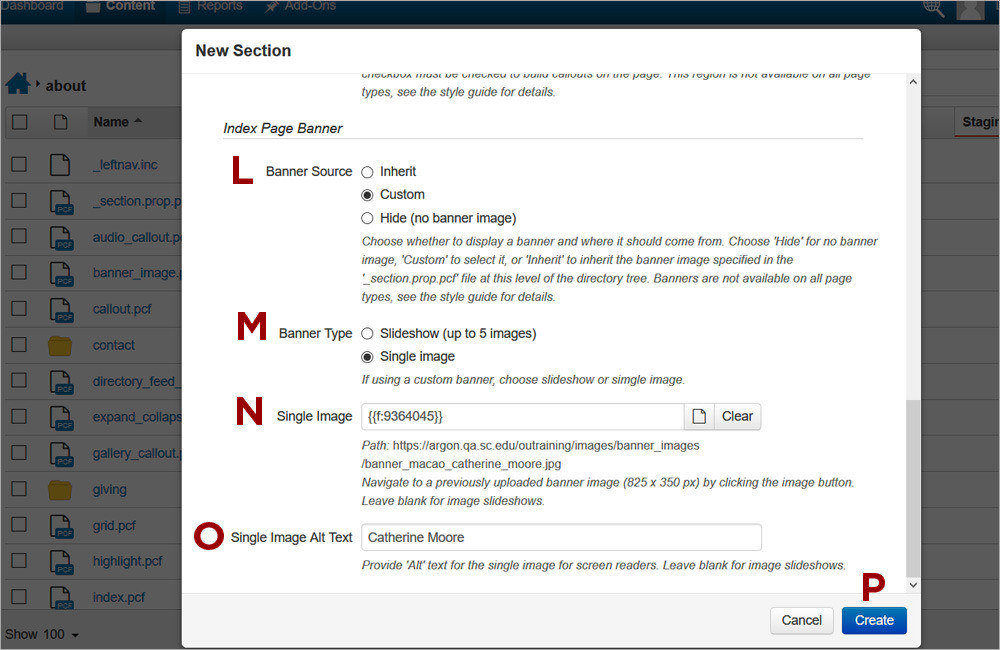
4. Fill out the Index Page Banner section of the wizard if you wish to enable a banner image for the index page.
- Banner Source (L) - select Custom to enable a banner image.
- Banner Type (M) - select Single Image to enable a single banner image or Slideshow to enable a slideshow of banner images or a video banner image.
- Single Image (N) - If the Single Image option (K) is selected for Banner Type, click on the file chooser (K) to navigate to a banner image (825x350 px) that has been uploaded to OU Campus.
- Single Image Alt Text (O) - If the Single Image option is selected for the Banner Type, update the default description to make the image accessible.
Click Create (P) to create the new section.