Watch the Video (18:01) and review the accompanying instructions.
-
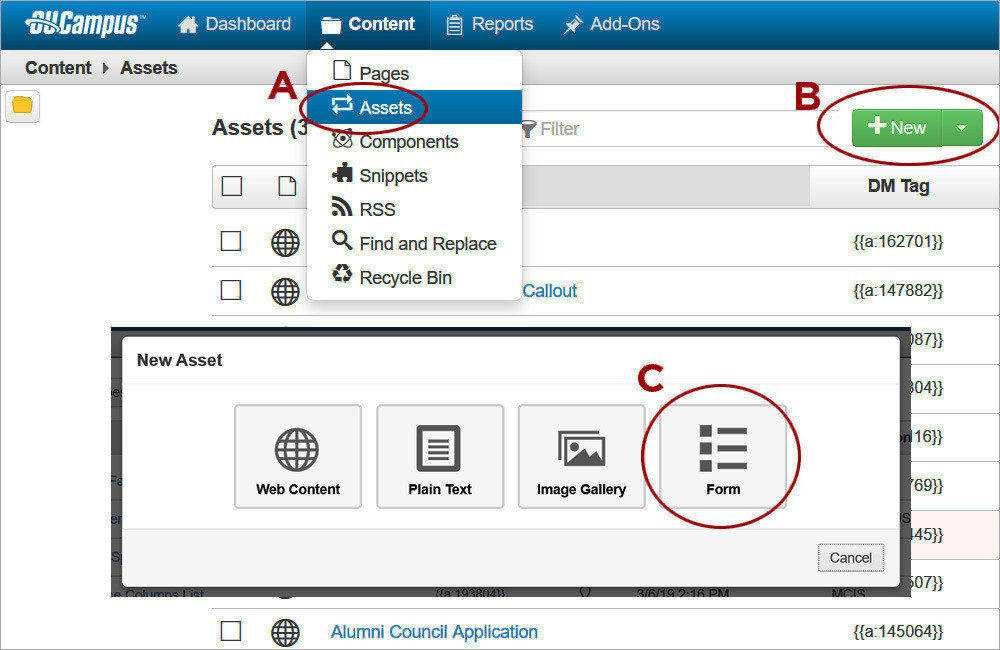
1. Navigate to the Asset Manager. Hover over the Content tab and select Assets (A). Click on New (B) and then on Form (C).
-
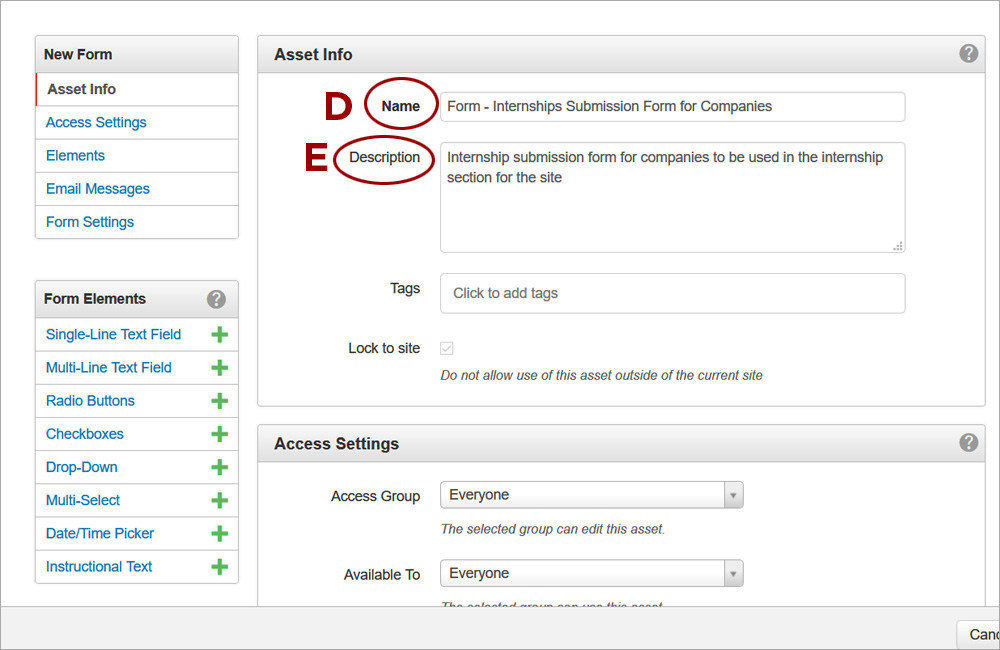
2. Update the Asset Info section. Type a descriptive Name (D), which can be searchable by keywords when the asset is being inserted later on. Type an informative Description (E), visible in asset properties, to help identify the purpose of the asset. Do NOT type any words in the Tags field. Tags are not being used with assets and any new tags are approved by Communications and Public Affairs.
-
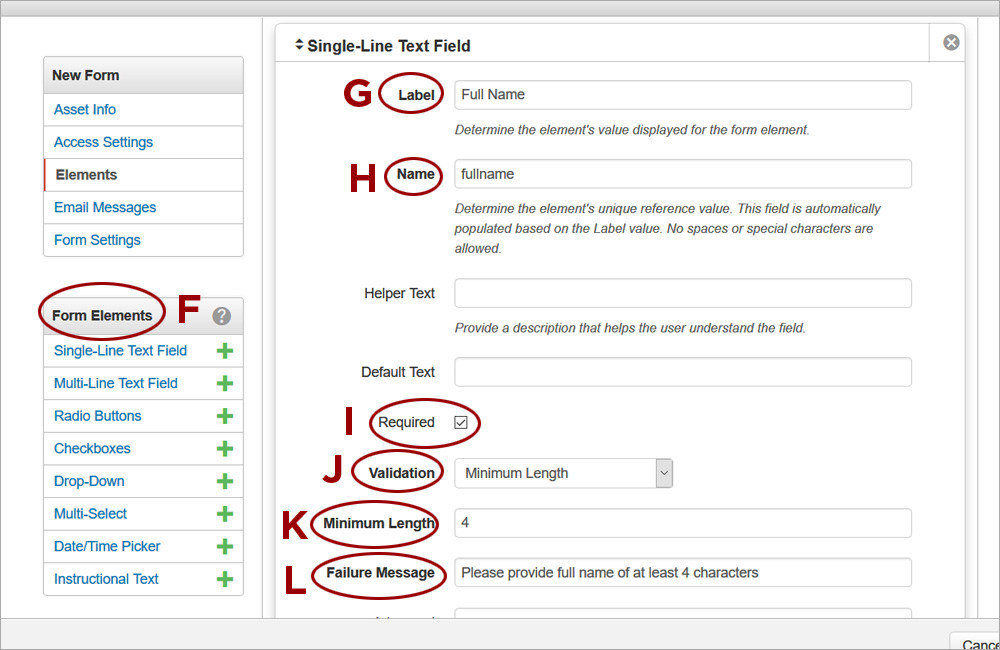
3. Add the Form Elements. To add a form element, click on the respective type of element in the Form Elements list (F). Provide a Label (G) for the element. The Field Name (H) will be generated automatically. To make the field required, select the Required (I) check box. To validate the field, select an option from the Validation dropdown (J). Fill out the validation rule for the Minimum Length (K) and Regular Expression options. If the field is required or being validated, provide a Failure Message (L).
-
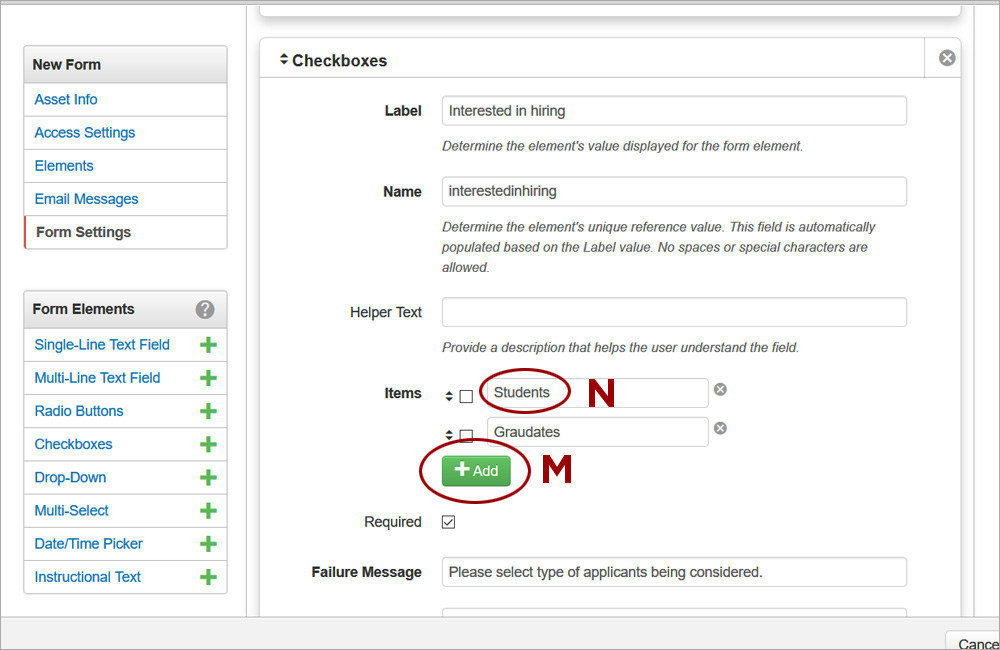
4. When adding Radio Buttons, Checkboxes, Dropdown, or Multi-Select, click Add (M) as many times as needed and type in the additional text field (N) to add the radio buttons, checkboxes, or drop-down options.
-
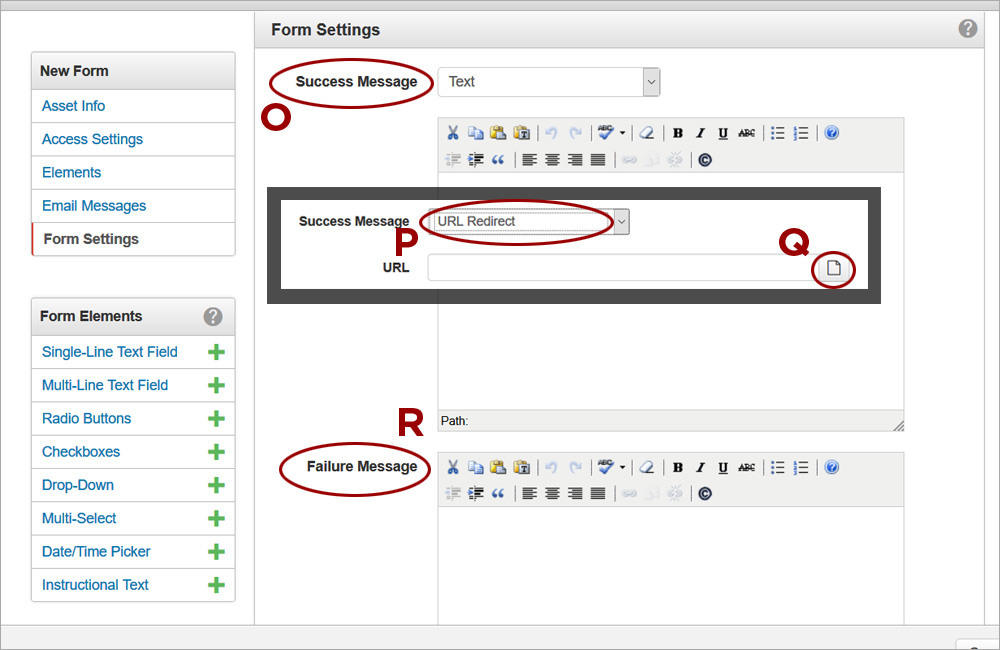
5. Provide Success and Failure Messages. Under Form Settings, type a Success Message (O) that will apear in green when the form is submitted successfully, Alternatively, select a URL Redirect (P) from the Success Message dropdown and click on the file chooser (Q) to navigate to a page within the site. Type a Failure Message (R) that will appear in red at the top of the page when the form submission fails.
-
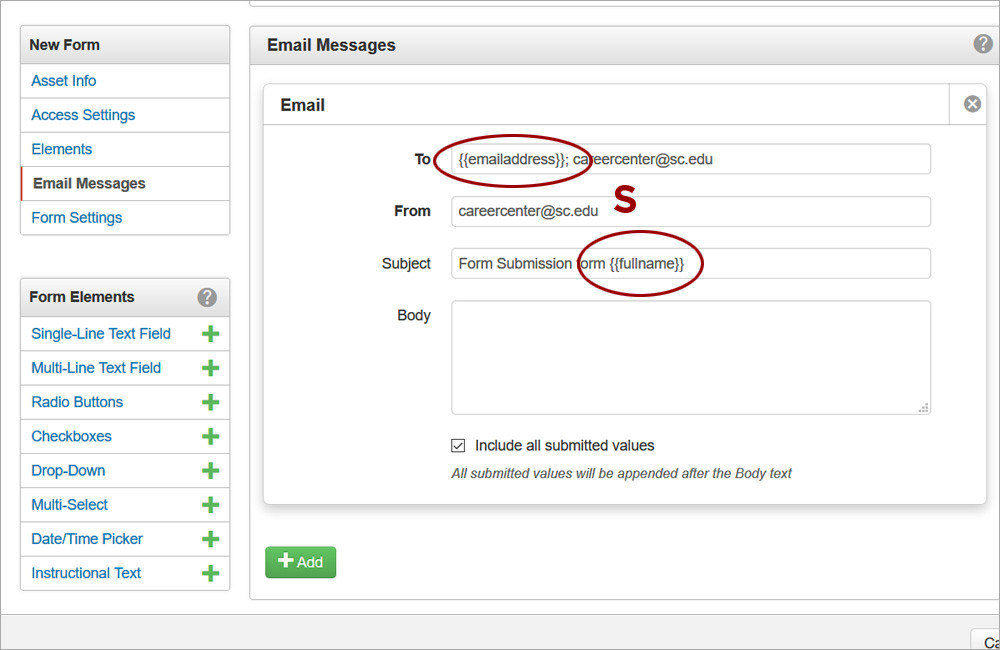
6. (optional). Configure one or more email messages to be sent when the form is submitted successfully. Dynamic fields can be added in the To, From, Subject, or Body of the email message. Dynamic fields pull the information submitted on the form. For example, to send an email to the person who submits the form, include an Email Address field with the form and enclose its Name (the text box after the Label for the field) between two sets of curly brackets (S). Separate multiple email addresses included in the To field of the email message with a semi colon.
-
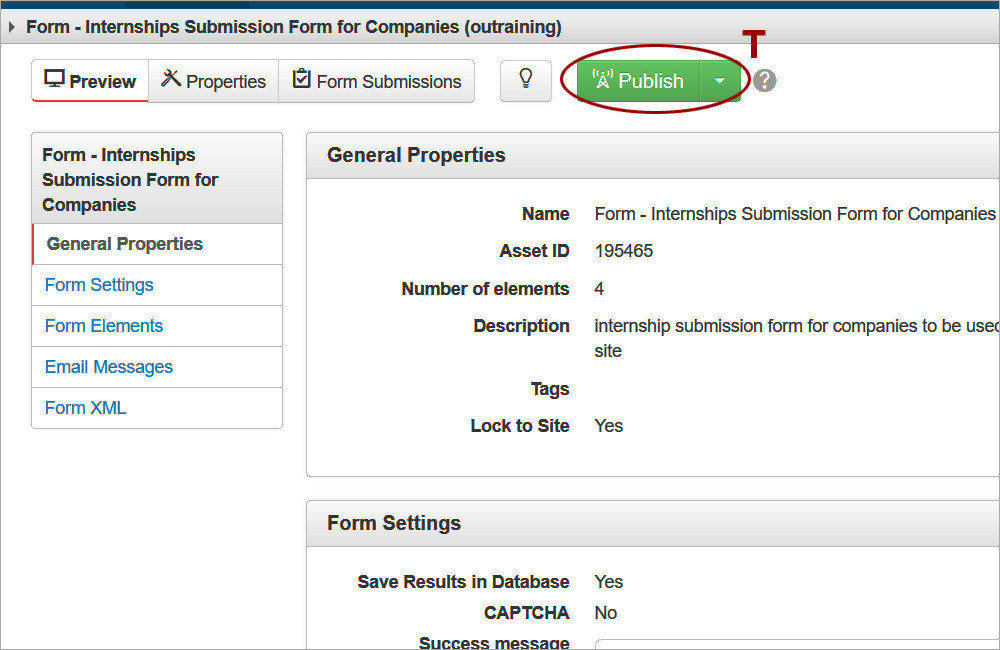
7. Click Create and Publish (T) the form asset. Assets will be saved in the versioning history when publish. Provide a Version Description to help easily identify the version.
-
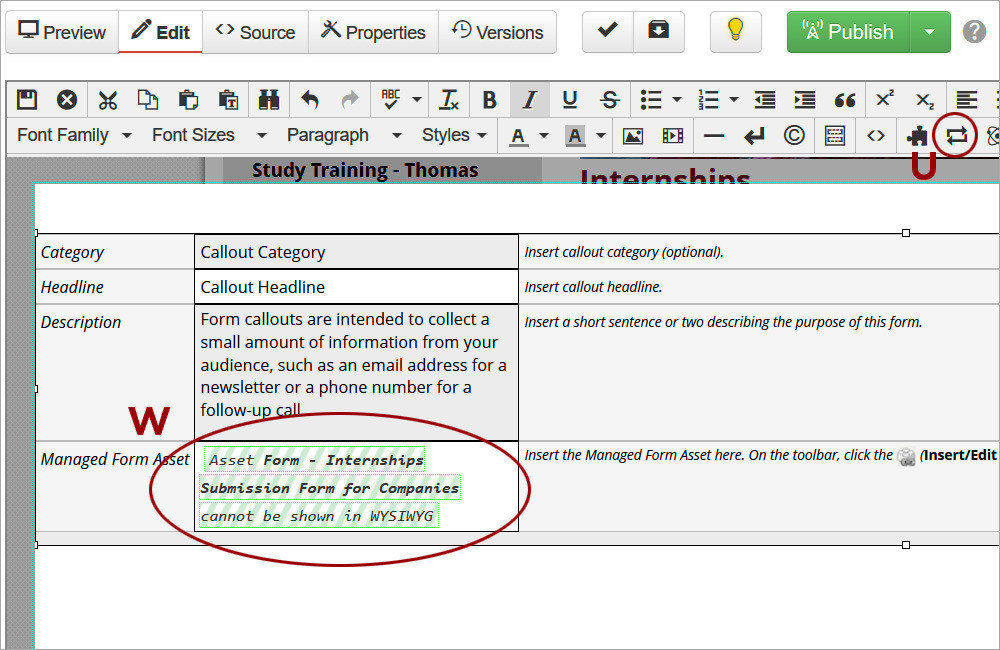
8. Navigate to the page where the asset will be used and insert it. Click on the Content tab to access the pages list. Once the page is located, access the editable region where the form asset will be added. Form assets are added by themselves in the Main Editable region or inside a Form Callout (W) in the Callout editable region. To add the asset, click on Insert Asset (U), select Form from the All Types dropdown, navigate to the asset, and click Insert.
-
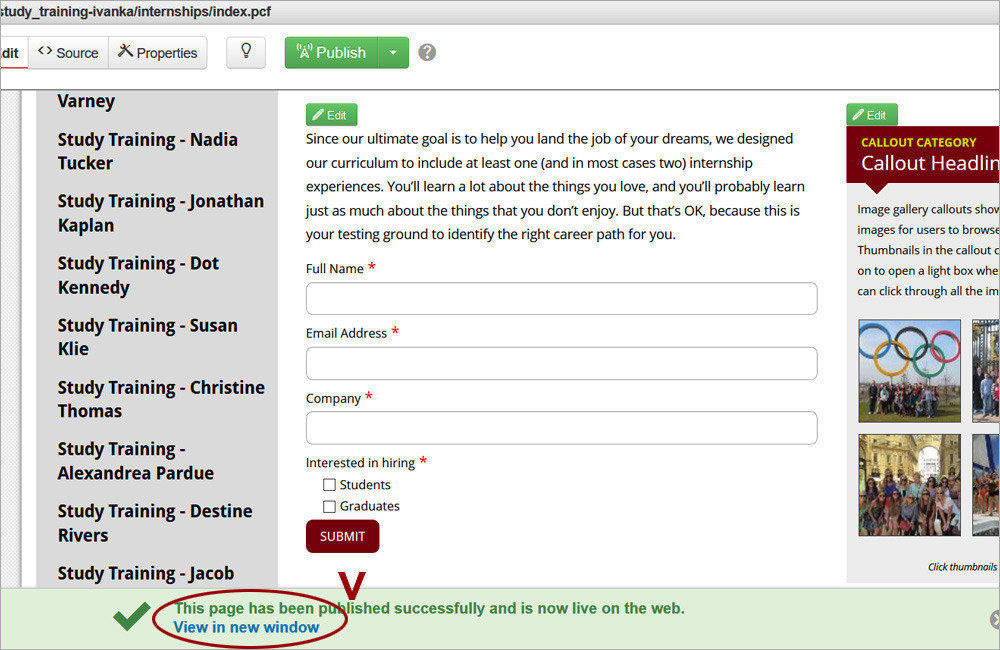
9. To test the form asset, publish the page and click on the View in New window (V) link. Fill out the form and click Submit.
-
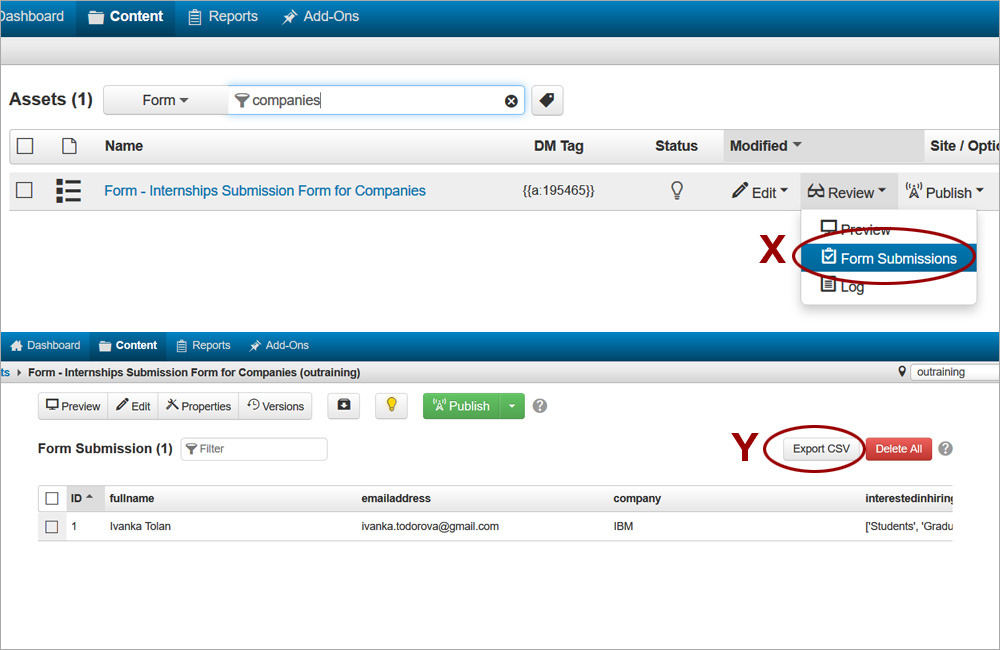
10. To access the form submissions, navigate to the asset and click on Form Submissions (X). Click on Export CSV (Y) to download a CSV/Excel file with the form submissions.