Watch the Video (13:11) and view the accompanying instructions on how to turn a snippet into a web content asset.
-
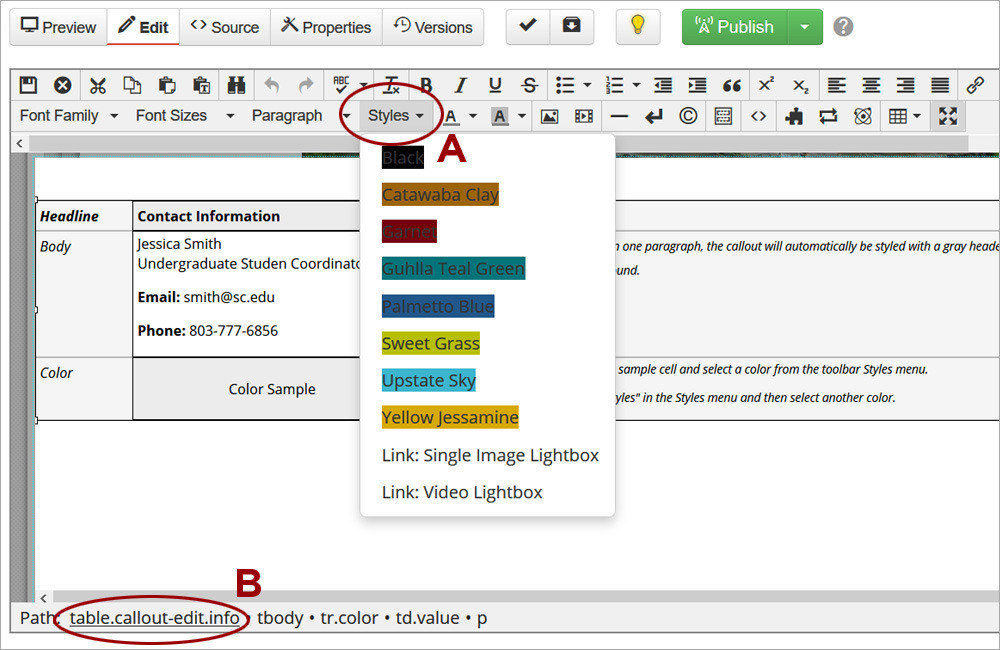
1. Create the information that will be repeated on multiple pages. When adding a snippet, place Content snippets in the Main Editable region and Callout snippets, in the Callout Editable region. Fill out the information and add any needed formatting such as selecting a color for the callout from the Styles dropdown (A). When finished updating a snippet, place the cursor in the snippet table, and click on the word table (B) in the left corner of the page. This will select the entire snippet table. Press Ctrl+X (Cmd+X on a Mac) to cut the snippet.
-
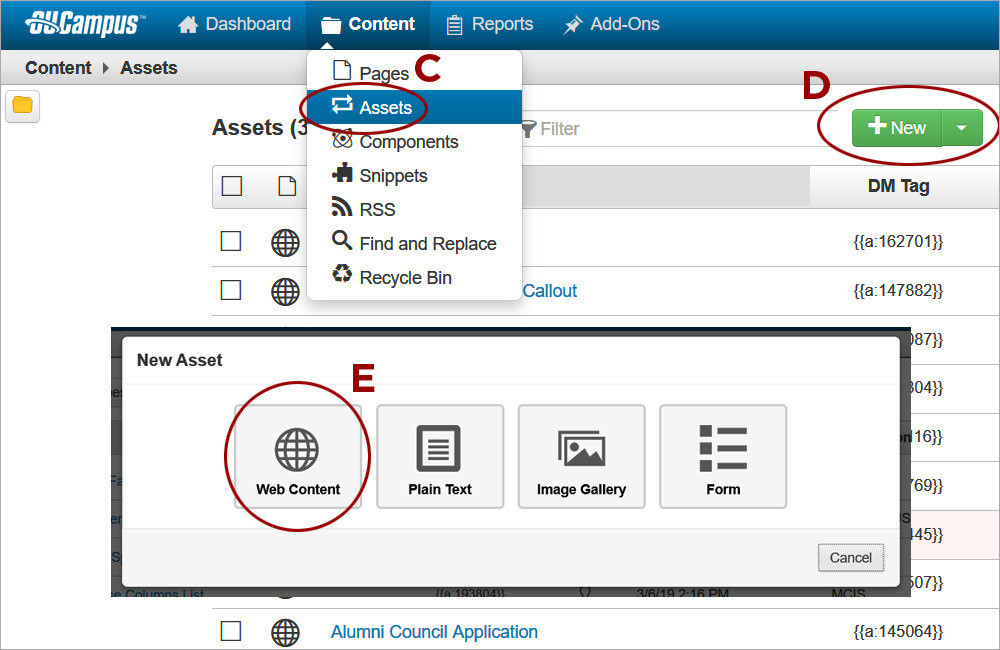
2. Navigate to Assets and select Web Content for the new asset. Hover over the Content tab and select Assets (C), click New (D), then Web Content (E).
-
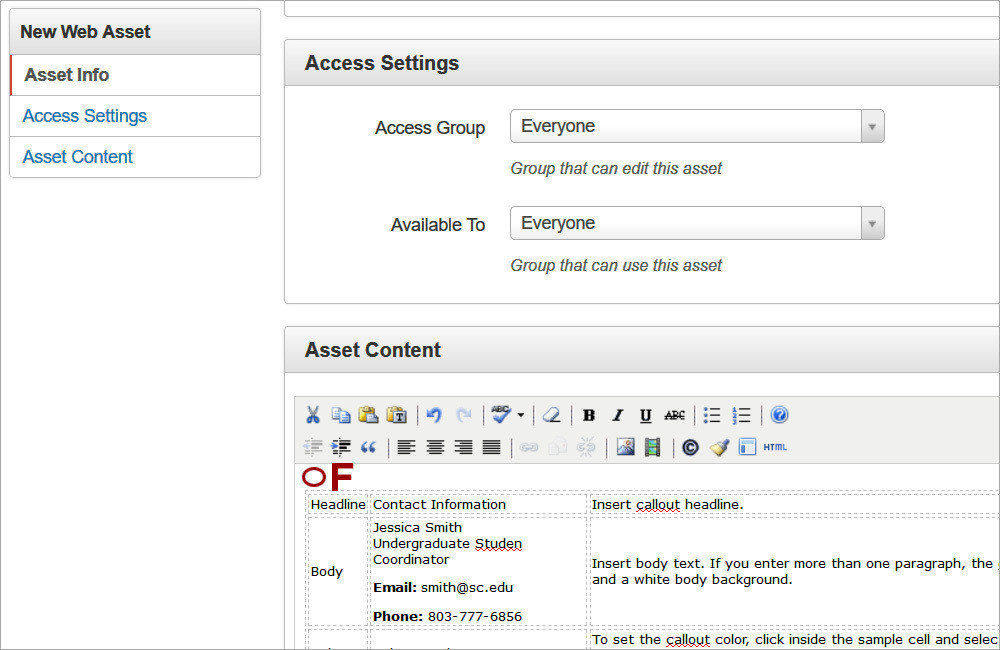
3. Paste the copied snippet or formatted text. Place the cursor in the Asset Content region (F) and press Ctrl+V to paste the copied snippet or formatted text.
-
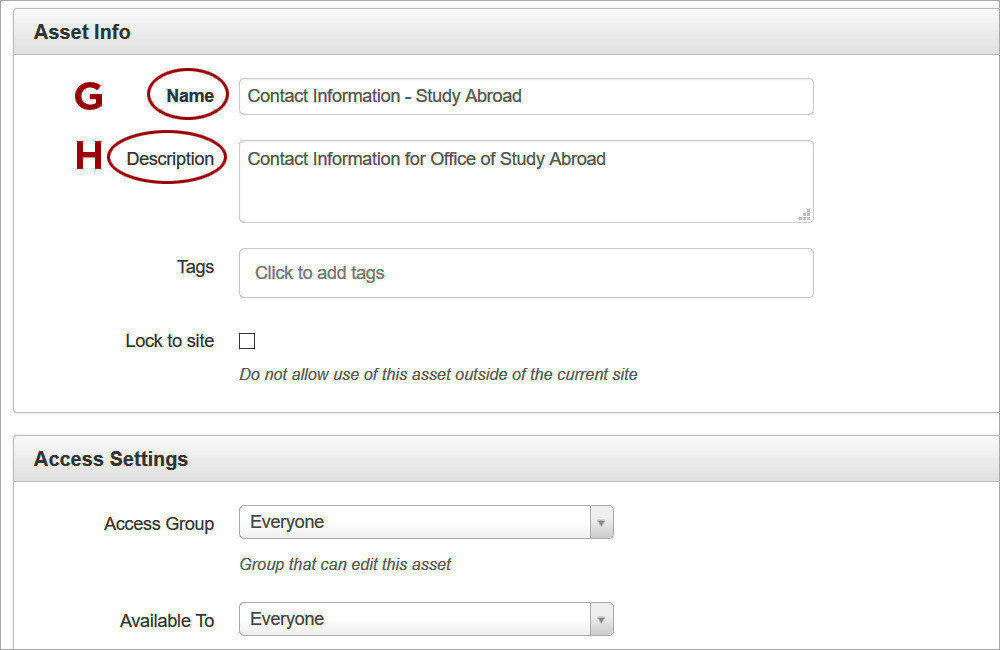
4. Fill out the Asset Info section. Provide a descriptive Name (G), which can be searchable by keywords when the asset is being inserted later on. Provide a Description (H) that is not visible anywhere except in asset properties but it can provide information on its use within the site. Do NOT type any words in the Tags field. Tags are not being used with assets and any new tags are approved by Communications and Public Affairs.
-
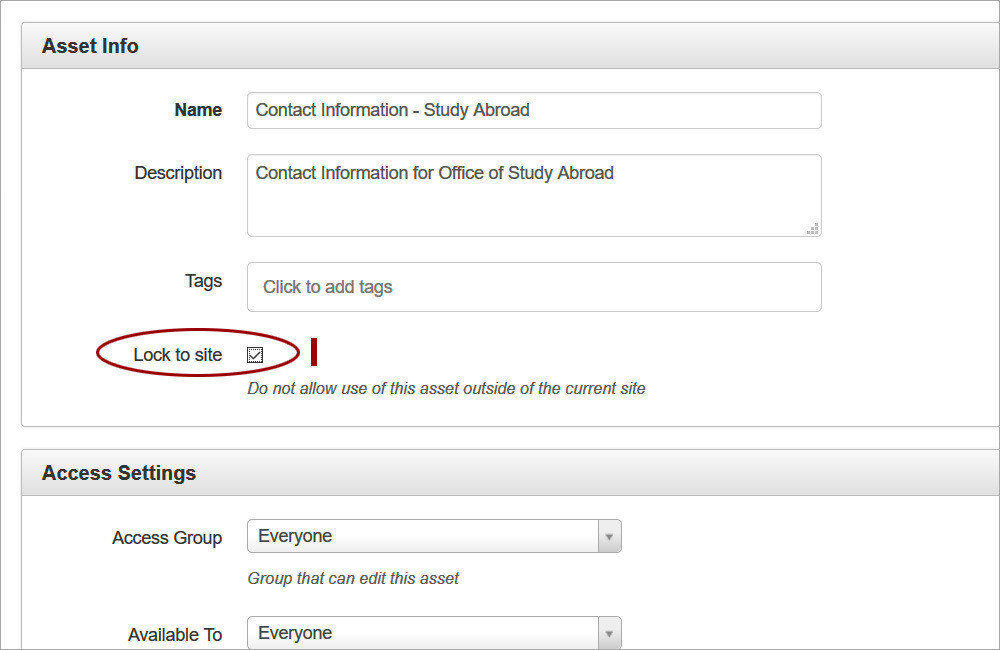
5. Limit the asset to the current site. Select the Lock to site checkbox (I) to make it available ONLY within the current site. Otherwise, the asset will be shared across ALL OU Campus sites, which has to be approved in advance.
-
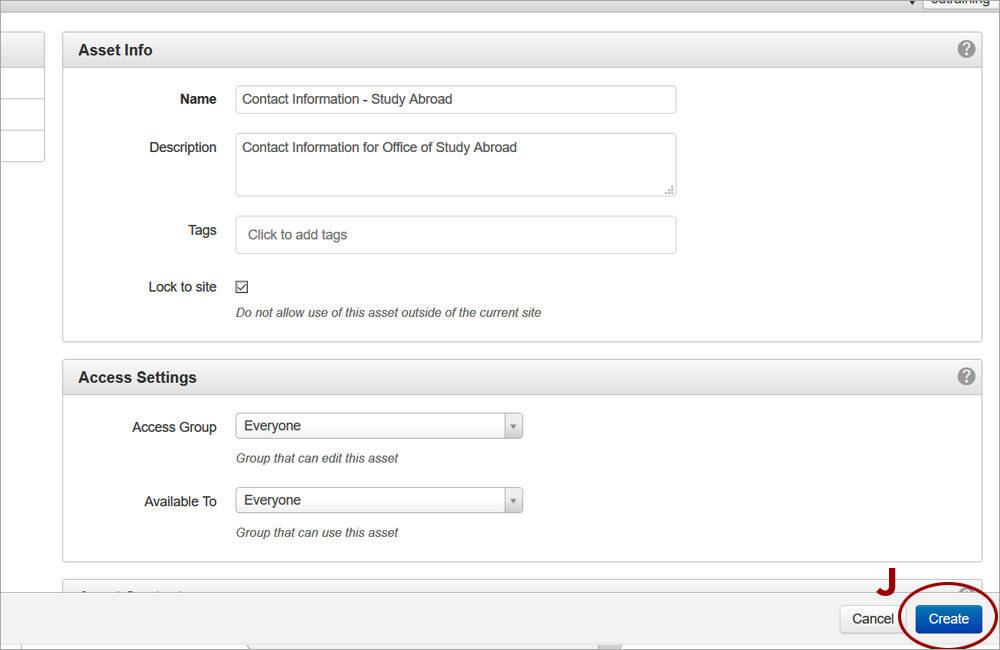
6. Save the changes. Click Create (J) to create the asset.
-
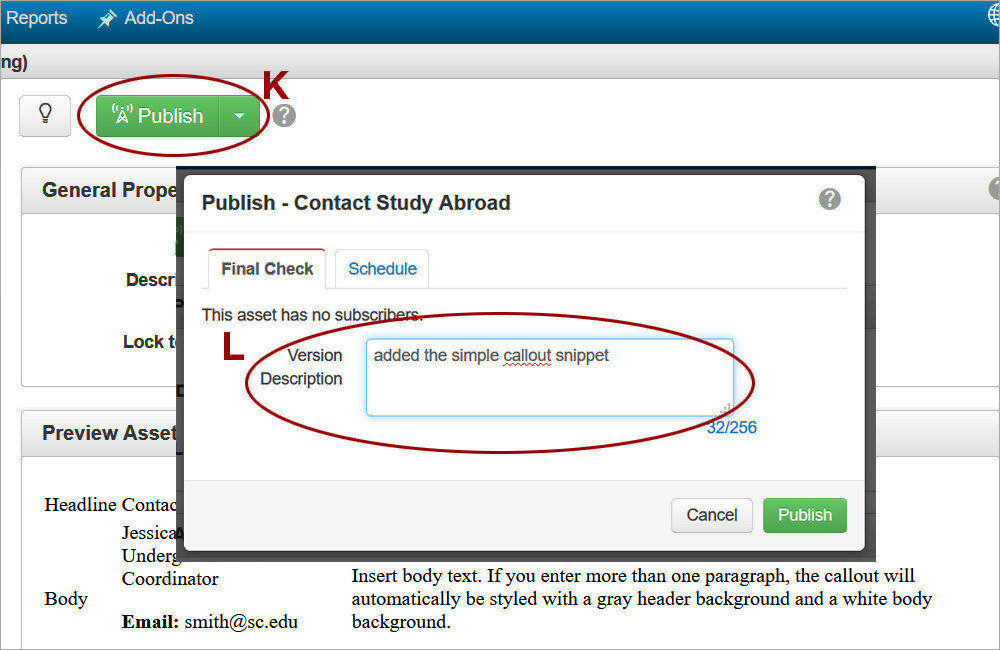
7.Publish the asset. Click Publish (K) to publish the asset. Providing a Version Description (L) is recommended since publishing the asset will save it in the versioning system.
-
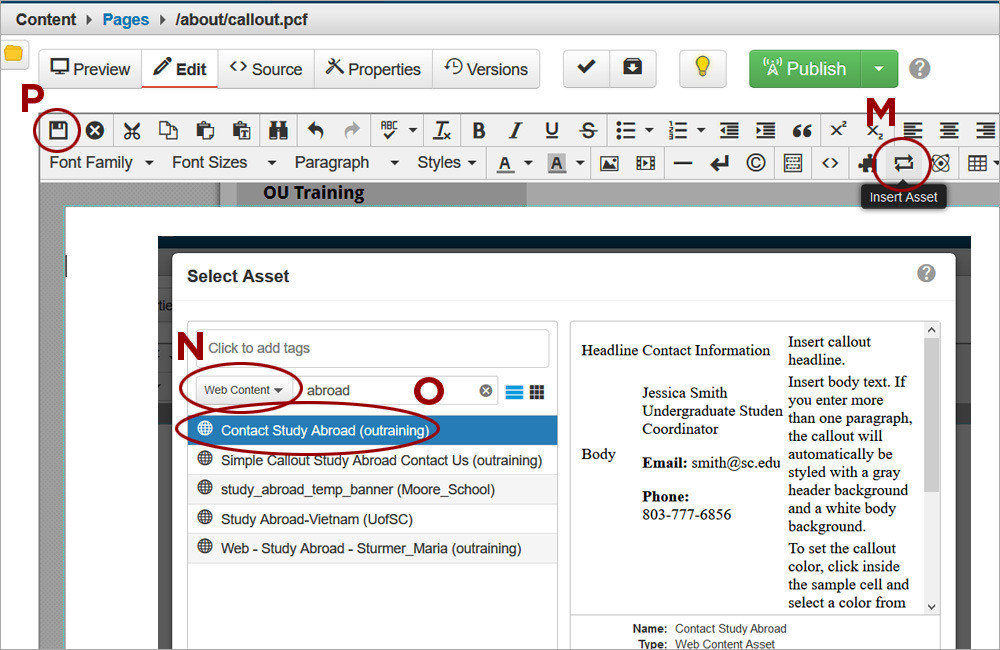
8. Insert the asset in the correct editable region. For example, if the asset uses a callout snippet, access the Callout Editable region. Place the cursor in the white area of the region outside an existing snippet and press Enter to allow inserting other callouts above the asset later on. Click on Insert Asset (M) and select Web Content (N) to filter assets by this type. Type a keyword from the Name of the asset added in step 4 to further narrow down the asset selection. Click on the asset in the list (O) and then on Insert. Save the changes (P) and exit the editable region.