Watch the Video (18:43) and review the accompanying instructions to learn how to create both types of gallery callouts.
-
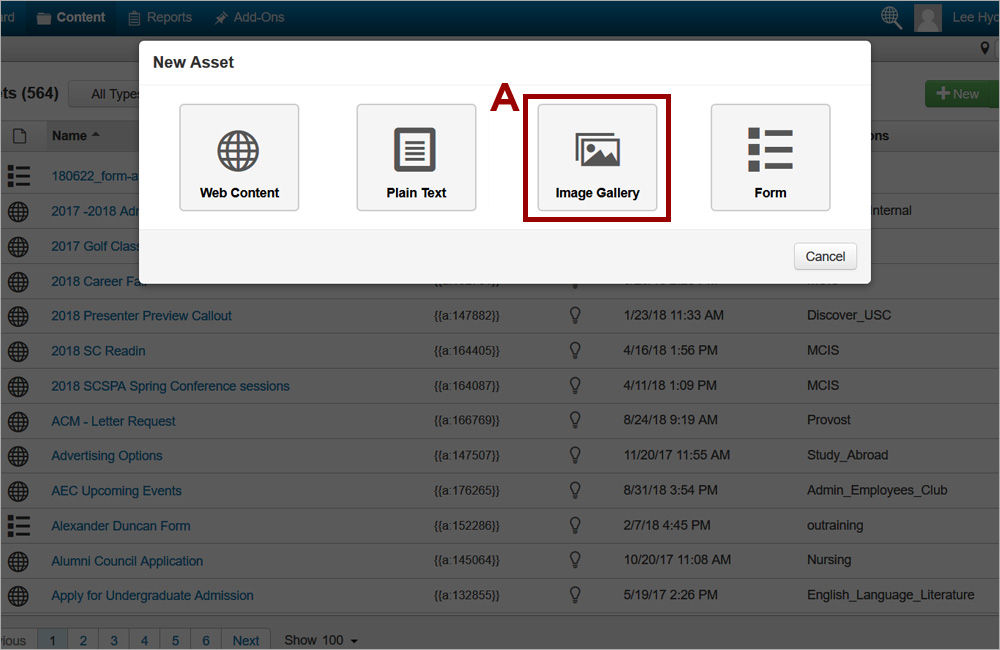
1. Create an image gallery asset via the Asset Manager. Hover over the Content tab in the blue ribbon and select Assets. Click the green New button. The list of asset types will appear. Click on the Image Gallery (A) asset in the list.
-
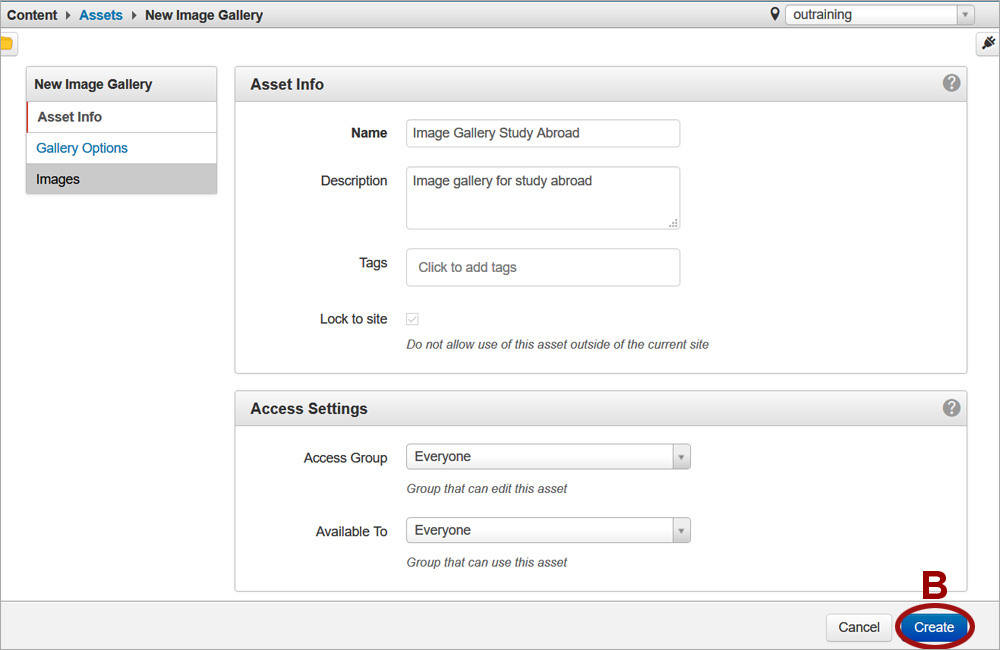
2. Provide a name and description for the asset but do NOT select any tags. Make sure that the name is descriptive enough so that you can easily identify the asset later on when inserting it on the page. Assets cannot be organized by folders like pages. Click the Create (B) button so that the Images section appears where the images can be added. If you get the message in red "Site information cannot be fetched", clear the cache by pressing Ctrl/Cmd+Shift+Delete. Exit the browser completely, log into OU Campus and repeat steps 1 and 2. The error message should resolve and you can proceed to the next step.
-
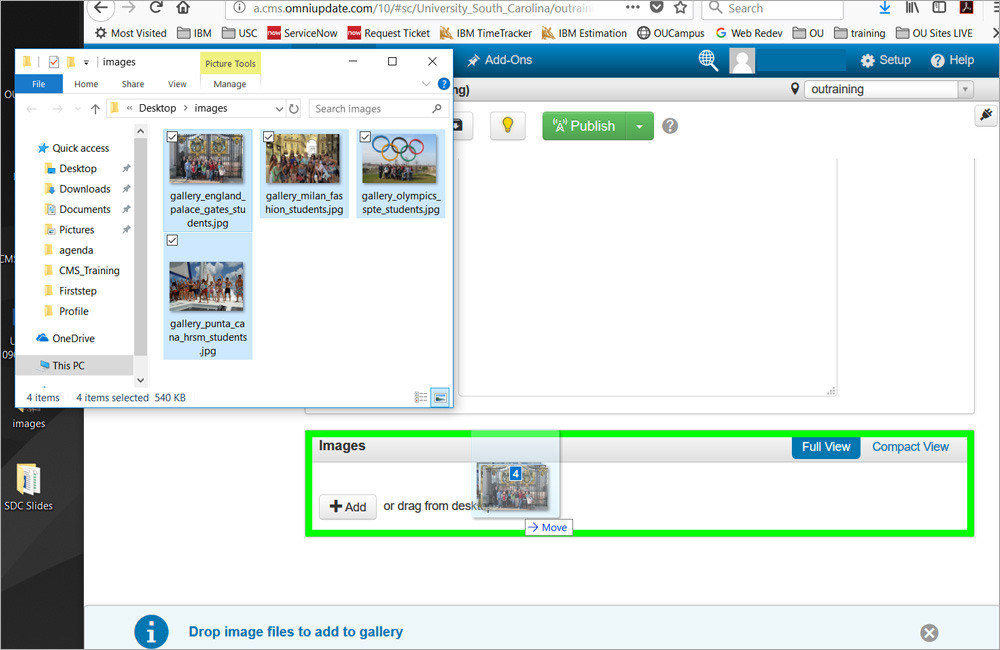
3. Scroll down to the Images section. Images can be uploaded by either dragging and dropping into the Images section/window (drop the images when a green border appears around the Images window) or by clicking on the Add button within the Images section. Multiple images can be added at once either way.
-

4. Once the images have been uploaded, update the Caption and Description fields for each image. The caption will display for the image in the gallery and the description will generate the alt tag for accessibility. Do NOT update the Title and Link fields as they are currently not being used.
-

5. Select Crop (C) for Thumbnail Aspect Ratio and click Set (D) next to Maximum Thumbnail Size to generate square thumbnails for the image gallery. Click Save (E) to save the asset. Last, publish the asset.
-

6. Click on the Content tab in the blue ribbon and navigate to the page where the image gallery will be displayed. Access the callout editable region and click the Maximize Content Region icon (F). Place the cursor in the white area of the editable region and press Enter. Click the Gadget icon and open the Snippets gadget. Select the Callout option (G) from the dropdown. Double-click on Image Gallery Callout (H) to insert it. Place the cursor in the white area of the editable region again and press Enter. Double-click on Single Image Gallery Callout (I) to insert it.
-
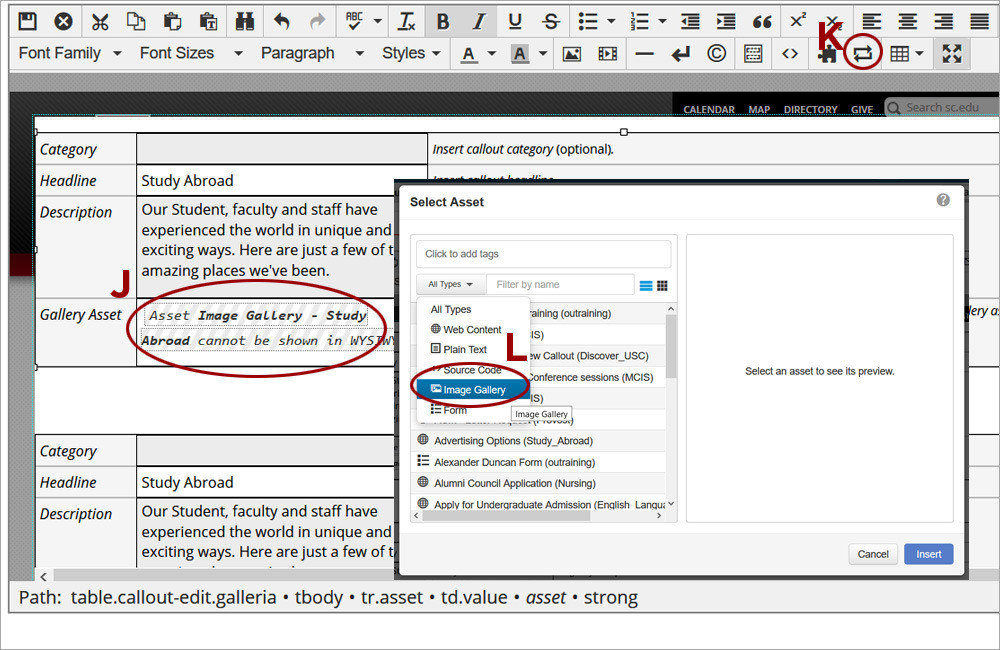
7. Fill out the Category, Headline, and Description for both the Image Gallery and Single Image Gallery callouts. Place the cursor in the white cell of the Gallery Asset row (J) and click on the Insert Asset tool (K) to insert the image gallery asset that was created earlier. In the Select Asset window, select Image Gallery (L) from the dropdown to narrow down the selection. Assets can further be filtered by keywords based on the Name field of the Asset. Click on the asset to insert it. Save the changes.
-
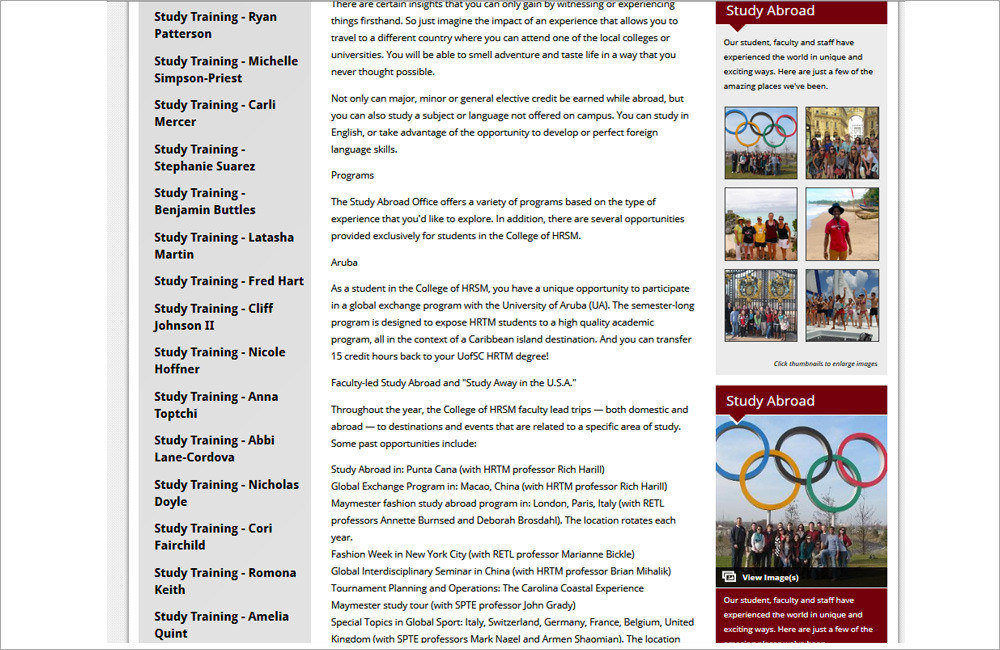
8. Save and preview the page. The Image Gallery callout displays up to 8 thumbnails. The Single Image Gallery callout will display the first thumbnail from the asset but once you click on a thumbnail you will be able to scroll through all the images.
-
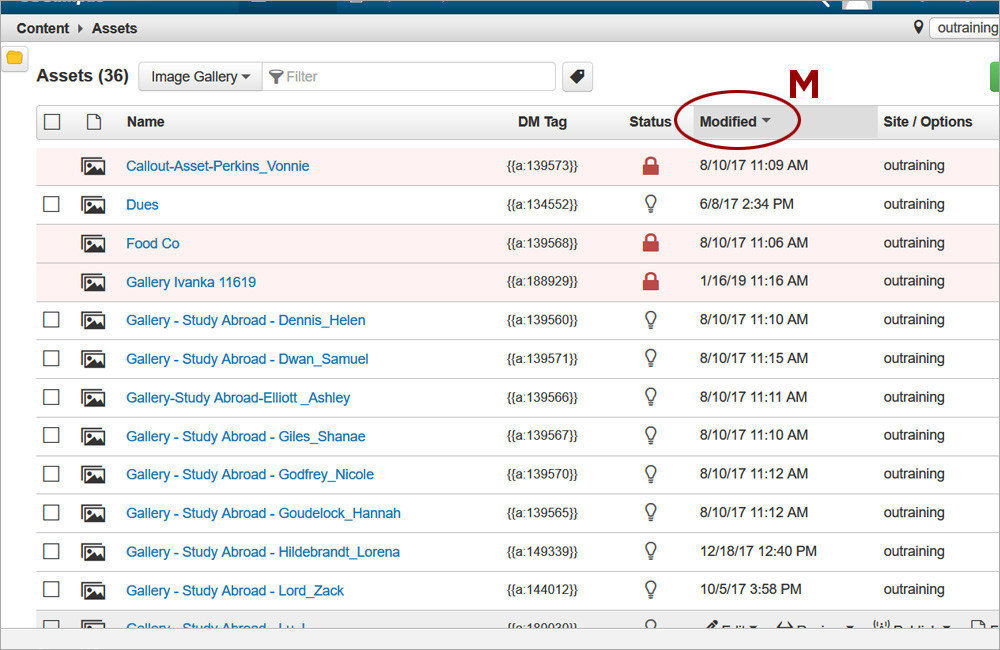
9. To edit the image gallery, navigate to the Asset Manager again selecting the Assets option from the Content tab in the blue ribbon. Click on the Modified column (M) to sort the assets with the most recent ones appearing at the top.
-
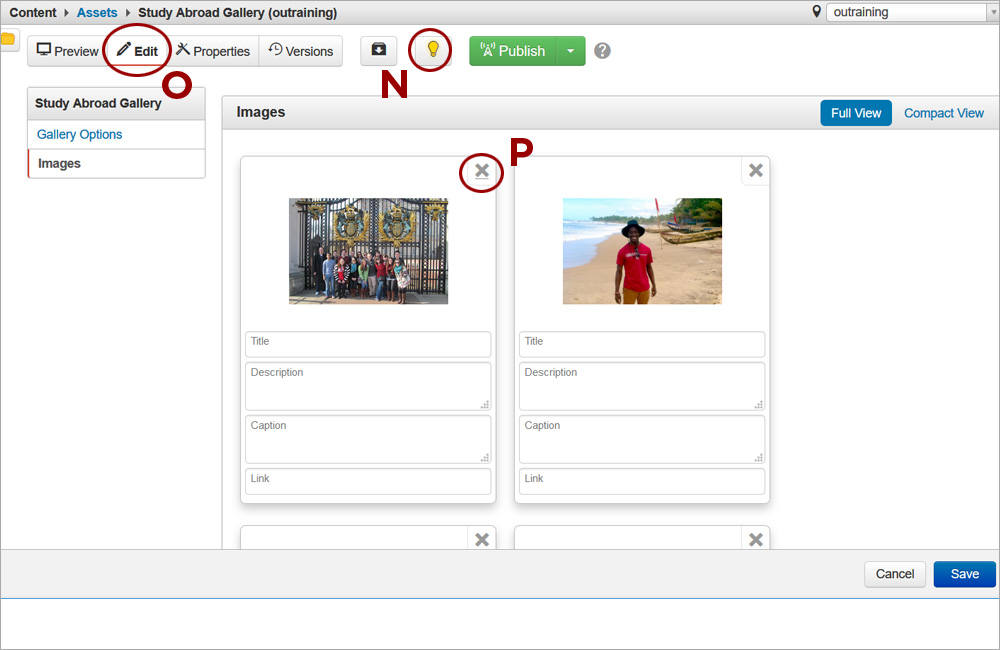
10. Click on the asset and then on its light bulb (N) to check it out. The Edit tab (O) will appear. Click on it to begin updating the asset. Images can be dragged to a different order in the gallery or deleted entirely by clicking on the X (P) in the right corner of the image. Don't forget to publish the asset when finished for the changes to take effect.