CMS Forms
Forms created within the CMS have all the tools you need to make your basic forms accessible, but you will still need to ensure that you are following basic form accessibility best practices.
However, for more complex forms that change based on what the user selects or uploads, you will need to use the university-approved form creation tool, Formstack.
Explanatory Text for CMS Forms
If you need to add instructions or explanatory text for a CMS form, it should go on the page itself rather than inside the form. Instructions can’t be properly labeled inside the form itself, and any text entered there may be skipped by screen readers.
Creating a CMS Form
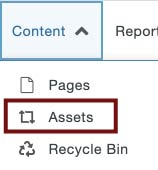
- Hover over the Content tab to select Assets.
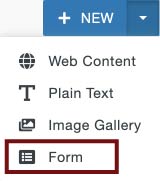
- Click New and select Form.
- Customize your form by writing clear content for the form questions, error messages,
and success message.
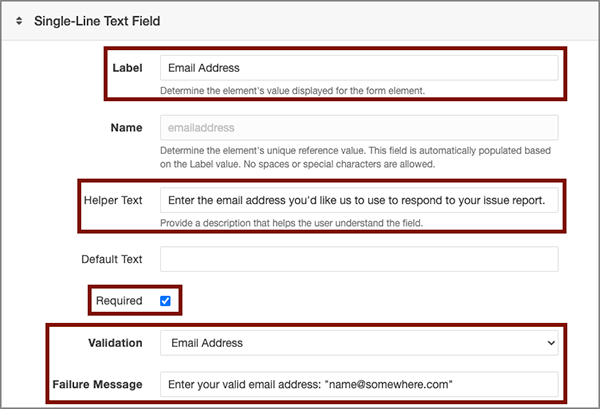
- Write an understandable Label for each form element. You won't be able to create your form asset without providing each label.
- Select the Required checkbox for all mandatory fields.
- Add Helper Text for any form elements that may be confusing.
- When appropriate, add a Validation method and a Failure Message to assist users in resolving errors in text fields.
- Click the Create button, then make sure to Publish the asset.
- You can now insert the form on your page.